Creating an Interactive Voice Response (IVR) Conversation
Last updated
Last updated
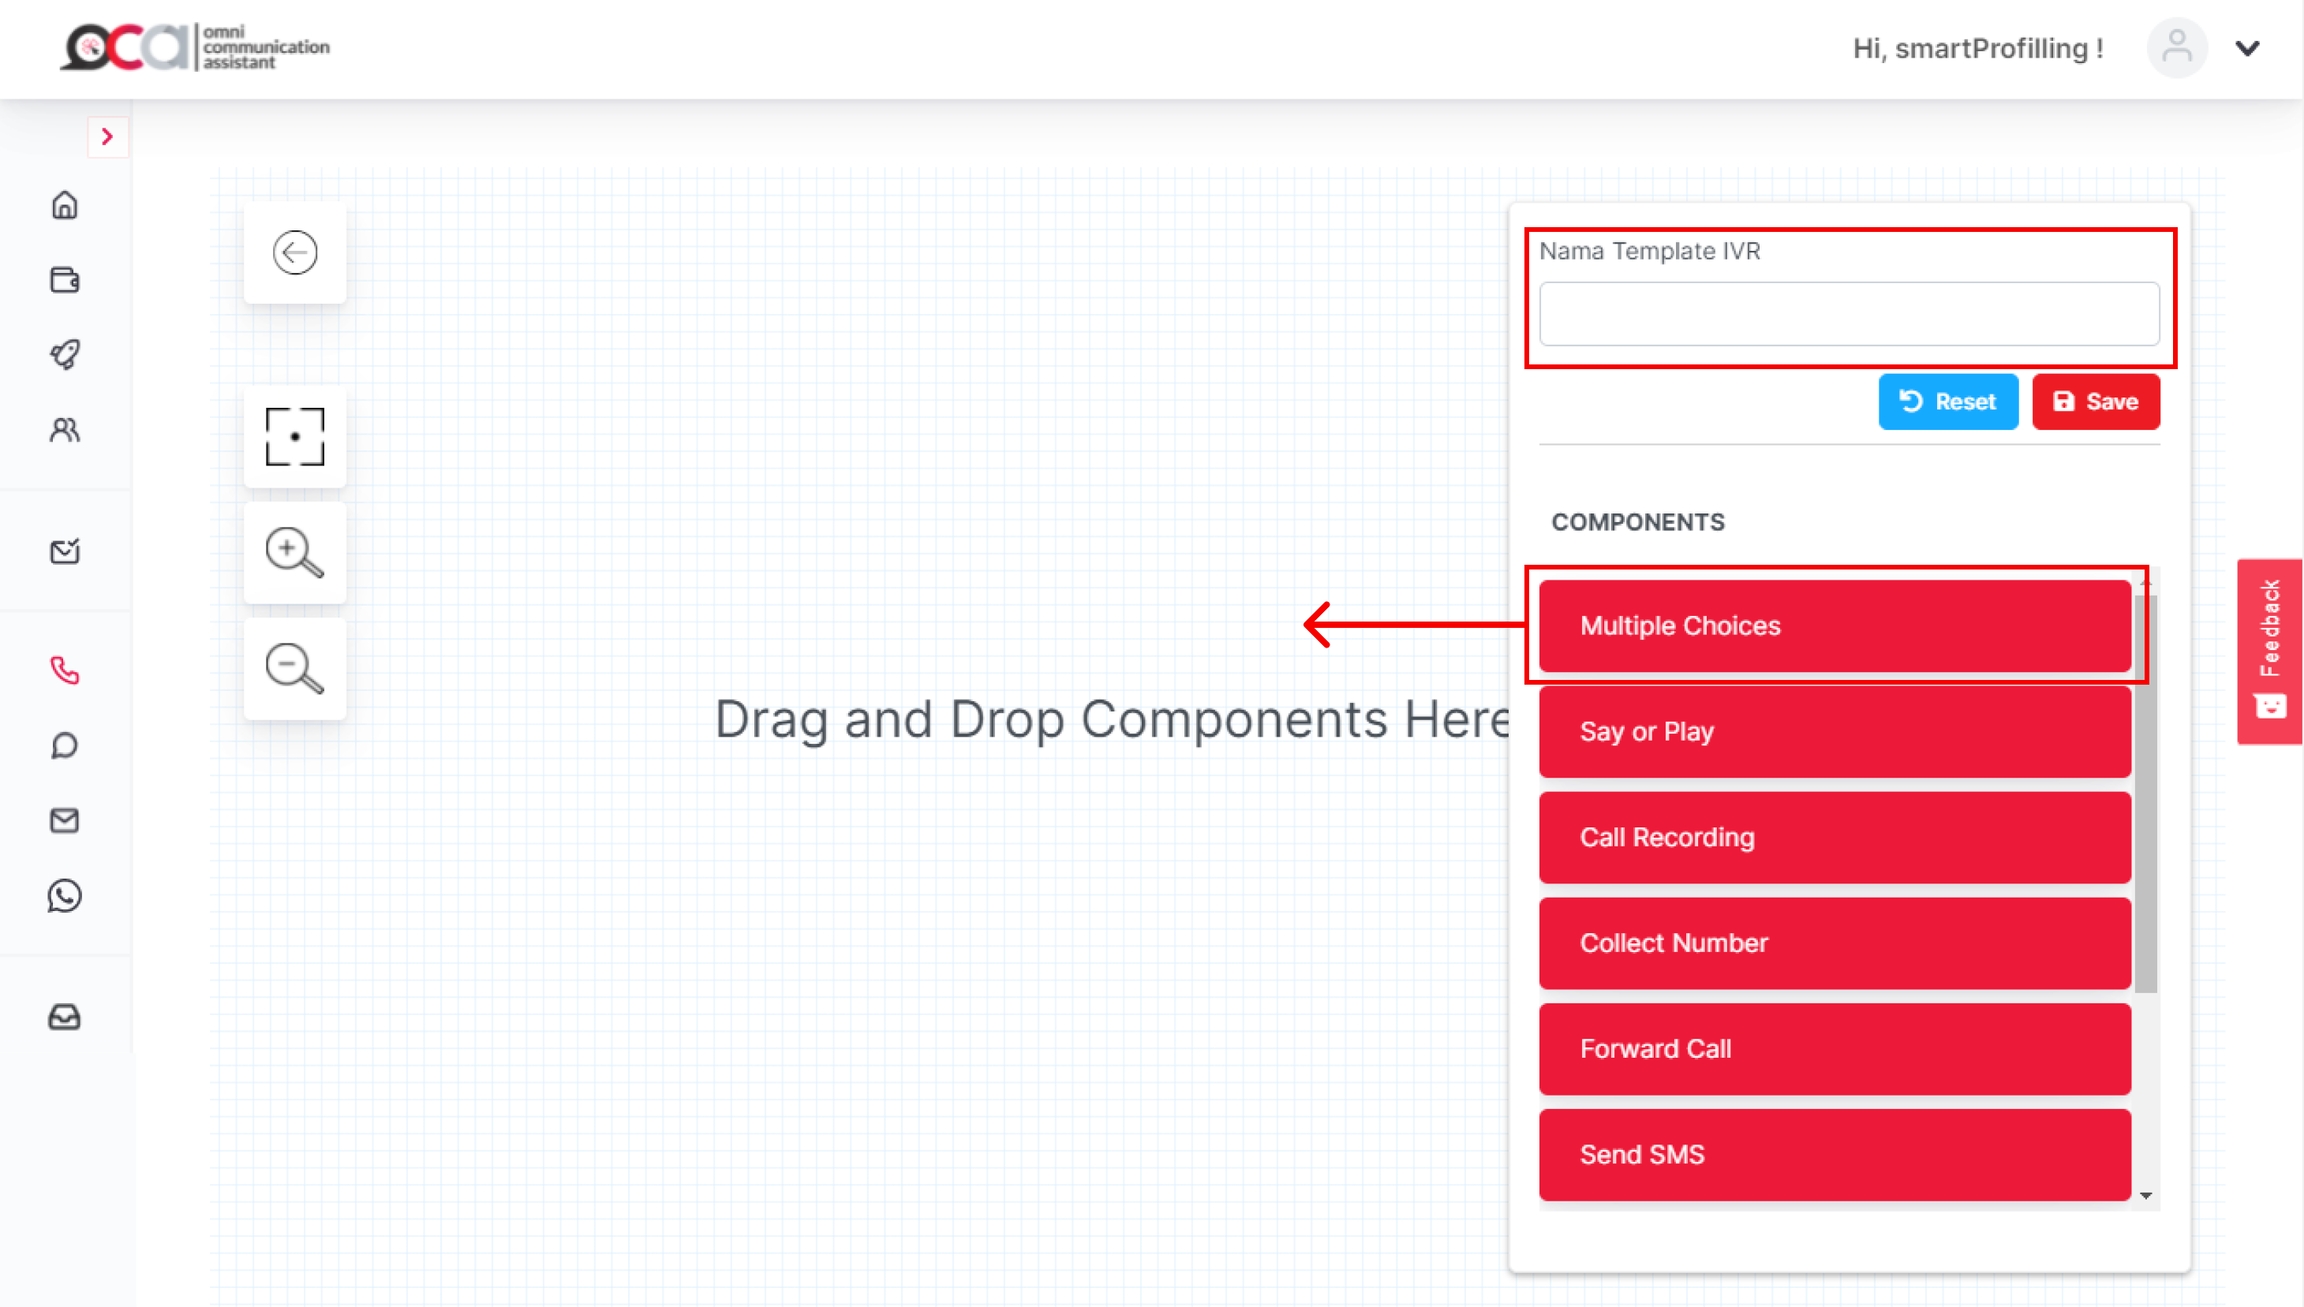
To create a new IVR, click Add IVR at the top right corner of the IVR page.
Enter the IVR name on the Nama Template IVR. Then, drag and drop one of the component you want to add to the IVR board.
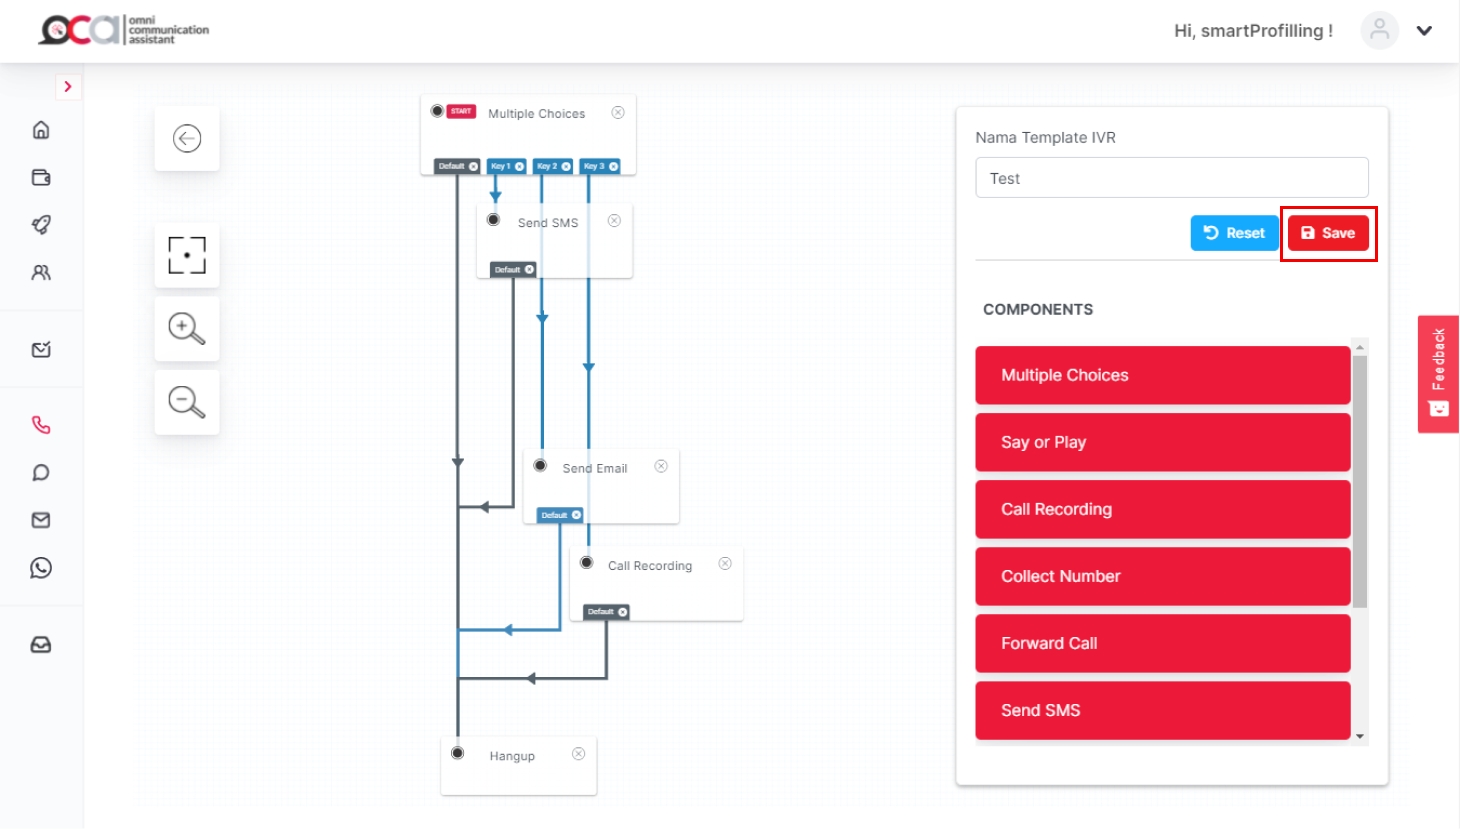
To connect each component with one another, click Default on the source component, then drag and drop to the targeted component. To remove the component connection, click the cross icon of the connecting line located in the source component.
Components that you can use on the IVR broadcast are:
This component is used if you want to play an audio recording on the IVR. The Play Audio component can be place in the beginning, in the middle, or at the end of the IVR conversation.
Enter the component name on the Label Komponen and enter the audio recording URL on the Audio URL. The audio recording file can be uploaded on the Recording menu.
Use the Multiple Choice component if you want to give several choices to your customers when they are interacting with IVR.
You will need to add an audio message to deliver information to your customers first as the Question. Select Say a Message to use the text-to-voice feature to deliver the information, or select Play a Message if you want to use your audio recording.
If you select Say a Message, enter the question script on the text box below the selection. Meanwhile, you can upload your audio recording if you select Play a Message.
On Retries section, enter the number of incorrect responses from your customers before the IVR system can repeat the question.
Then, enter the IVR response timeout (in seconds) in the Timeout section. This will terminate the call if customers exceeds the specified time.
On the Invalid Response section, you can add or create an audio response that inform your customers about the incorrect responses they have given.
Meanwhile, if the customer does not give out any response, you can add or create a message informing them that no response was received on the No Response section.
You can set the choices you will provide to customers during the IVR conversation in the Options section. Click the numbers you want to set as the customers' responses.
You can later connect each number choice (response) to other components within the IVR system.
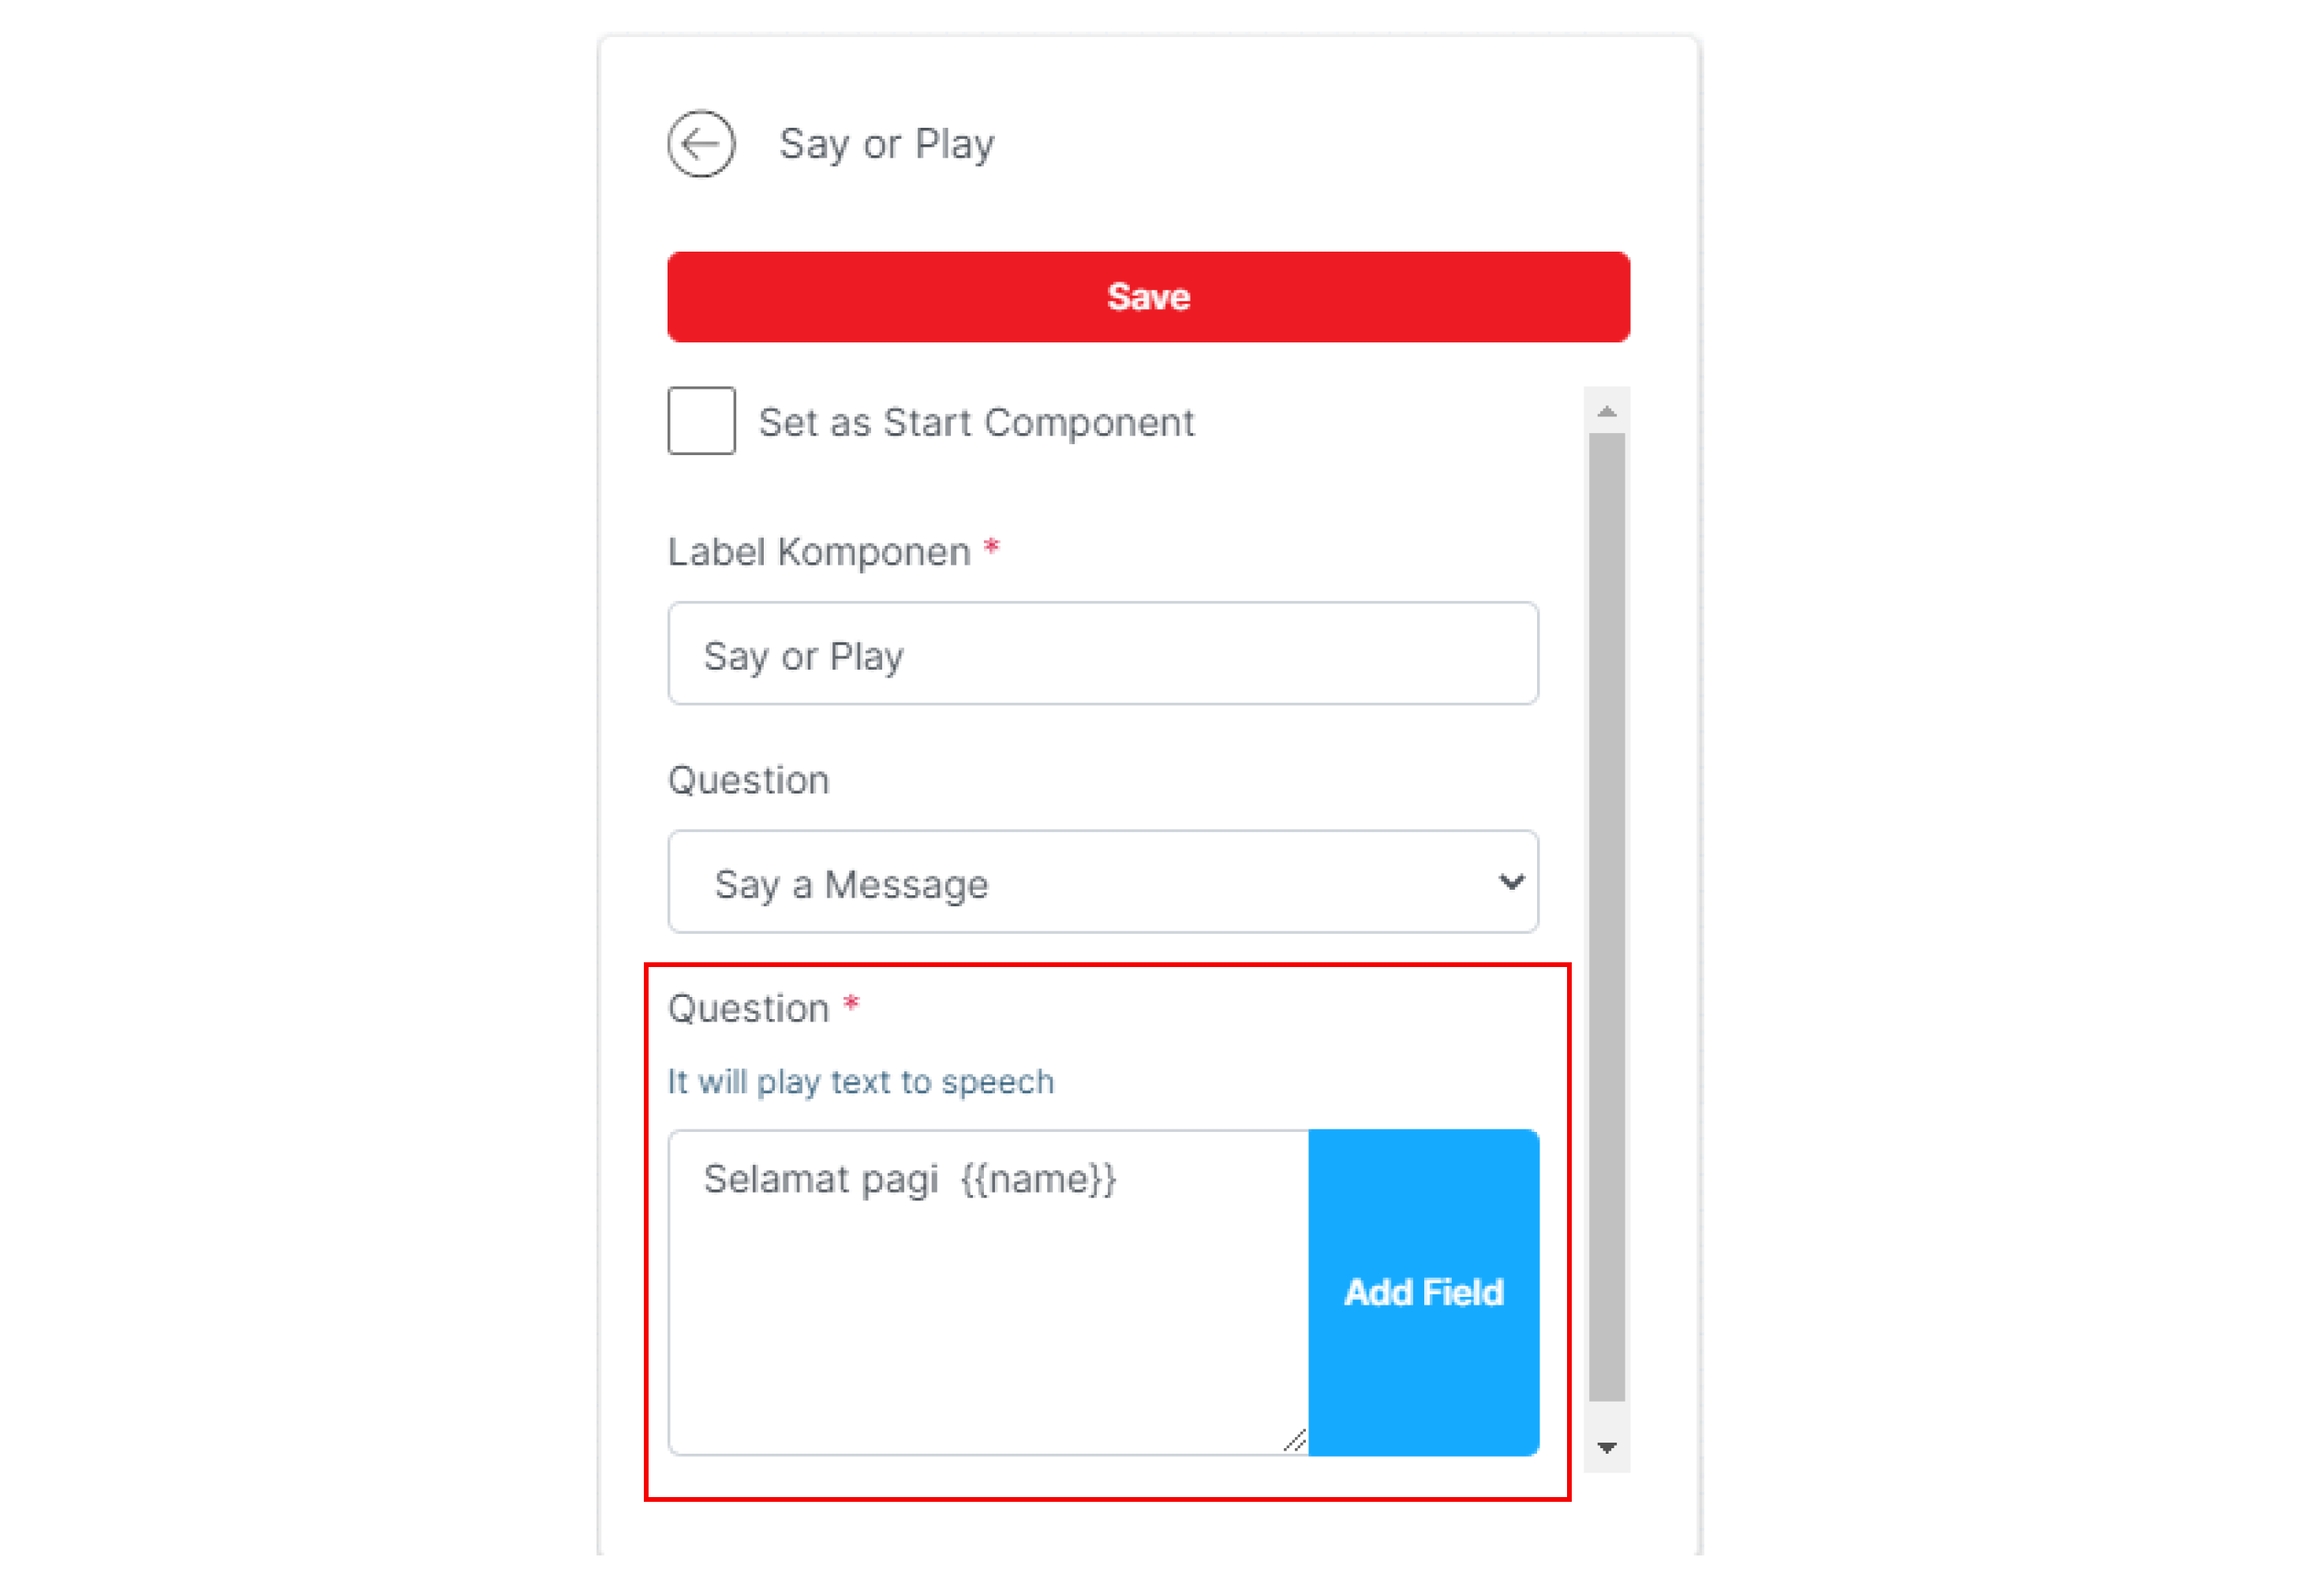
Gunakan komponen ini untuk menyampaikan informasi dengan menggunakan fitur text-to-speech dengan memeilih Say a Message pada bagian Question, atau sampaikan informasi Anda melalui rekaman audio dengan memilih Play a Message.
Anda juga dapat menambahkan konten dinamis sesuai dengan identitas pelanggan pada komponen ini dengan memilih Add Field. Sebagai contoh, Anda dapat menambahkan variabel nama, alamat email, nomor telepon, dan data lainnya.
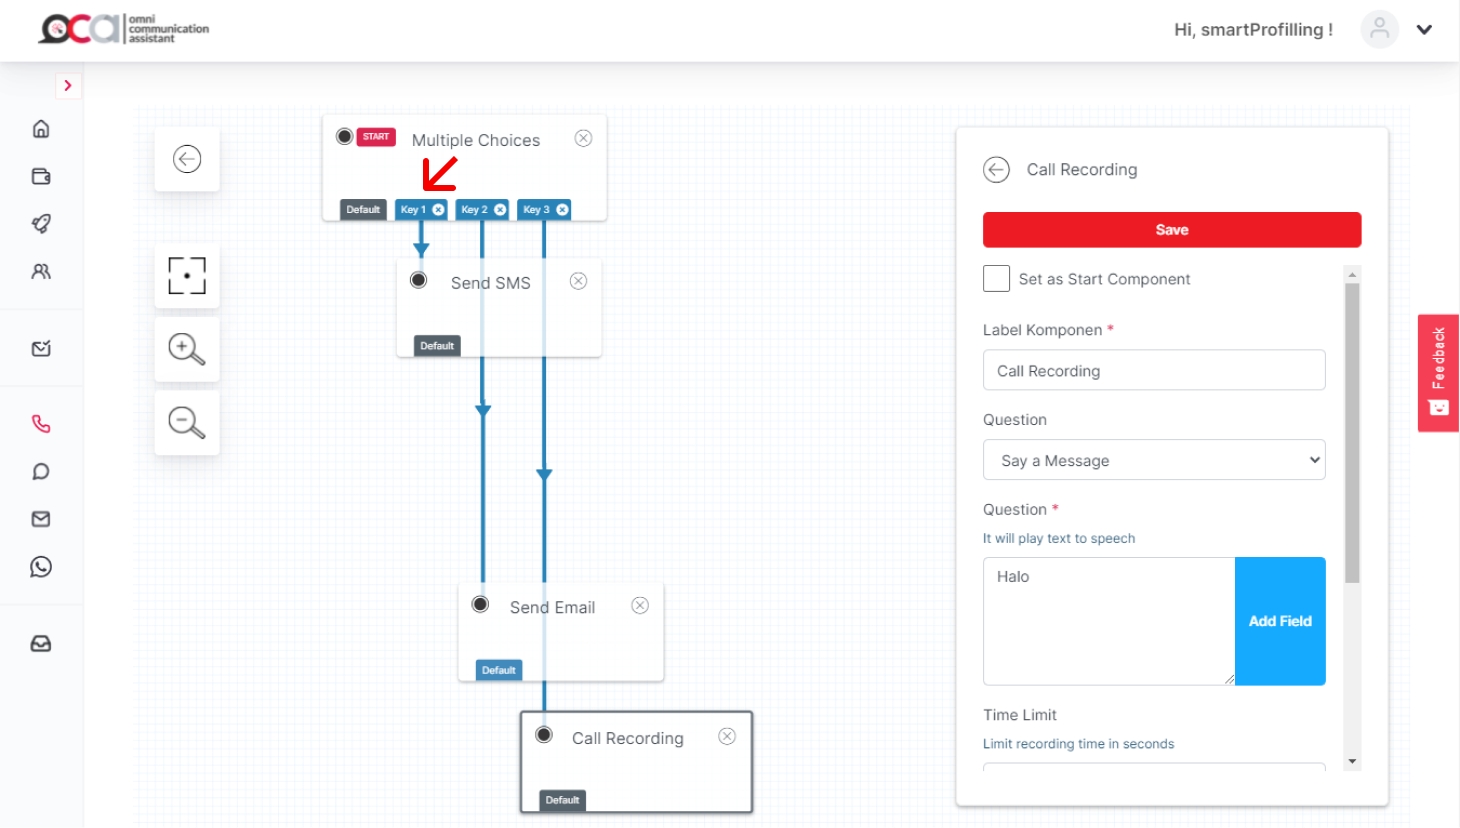
The Call Recording component can be used to record the customer responses in an audio format.
Enter the message or question in the Question section. Then, you can set the recording duration for the customer's responses after the IVR message is delivered in the Time Limit section.
In the Terminator Pressed section, set the symbol that your customer can use to end the recording session.
You can also enable a sound effect to indicate the start of the audio recording by activating the button in the Beep Sound section.
In addition to audio recording, you can also record your customer responses in the form of numbers, such as when you need to collect data like customer ID, phone number, voucher number, and other numerical information.
Enter the IVR response timeout (in seconds) after the customer successfully inputs each digit in the Time to Wait section.
You can set the minimum and maximum number of digits the customer can enter in the Min and Max sections. If the IVR does not receive any response, you can set the maximum number of retry attempts in the Retry section.
To confirm and repeat the numerical data entered by the customer by enabling Spell After Collect.
Select the symbol that the customer will use to end the data entry session in the Terminator Pressed section.
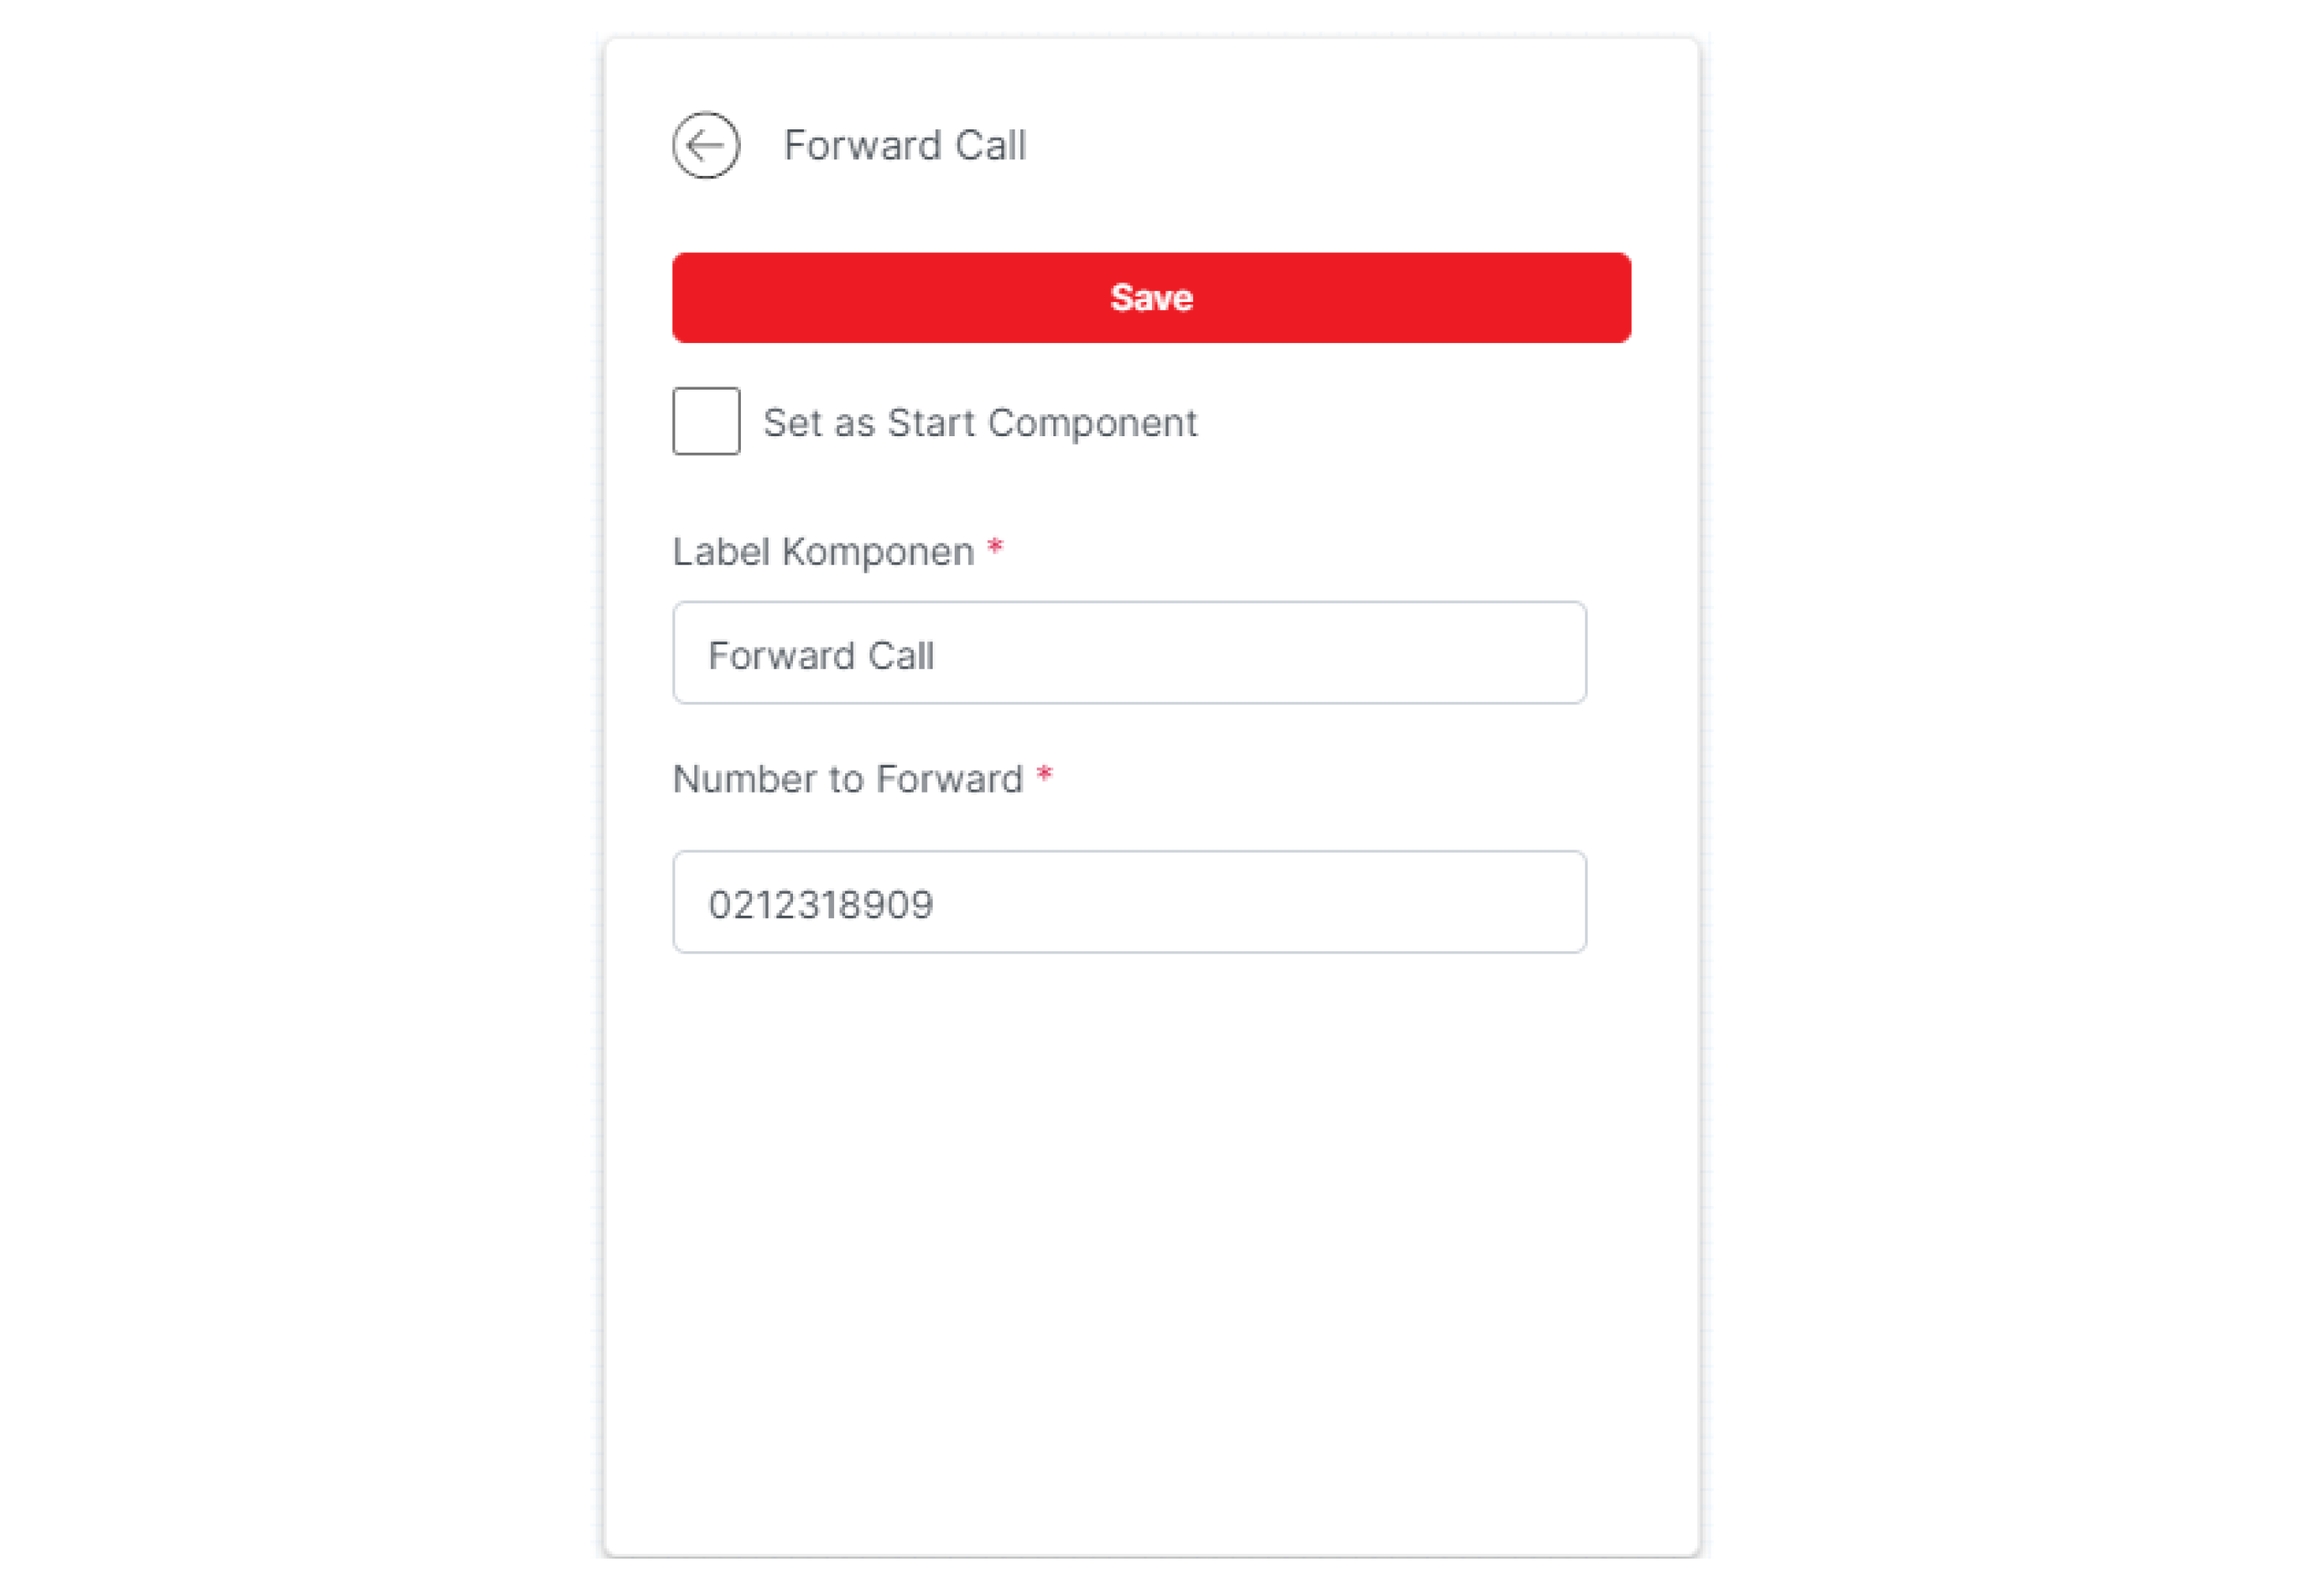
The Forward Call component can be used if you want to hand over the IVR call to other calls, such as to Live Agent. Enter the number that will be forwarded in the Number to Forward section.
If you want to send additional information using SMS after the call is completed, use the Send SMS component.
Enter the message template to be sent in the Message section.
You can also send the additional information through WhatsApp after the call is completed by using the Send WhatsApp component.
Select your WhatsApp Template and the template message can be reviewed in the Message section.
Another way to send information to your customers after the call ends is through email.
Enter your email address that will be used as a sender in the Sender Email section and enter the sender name in the Sender Name section.
Enter your email subject in the Subject section. You might as well make the subject more dynamic by clicking Add Field to add a customer data variable.
Enter your body email in the Message Body section or use an existing template by clicking Use Template.
Use the Hangup component to end the IVR conversation. Make sure that every last component in each conversation flow has been connected to this component.
If you did not use the Hangup component in your IVR, any IVR conversation will not be saved in your dashboard.
Click Save at the top right of the box to save your IVR conversation.
