
Creating Contact Groups
To create a new contact group, simply follow these steps:
Click on the "Add Contact Group" button at the page's top right corner.

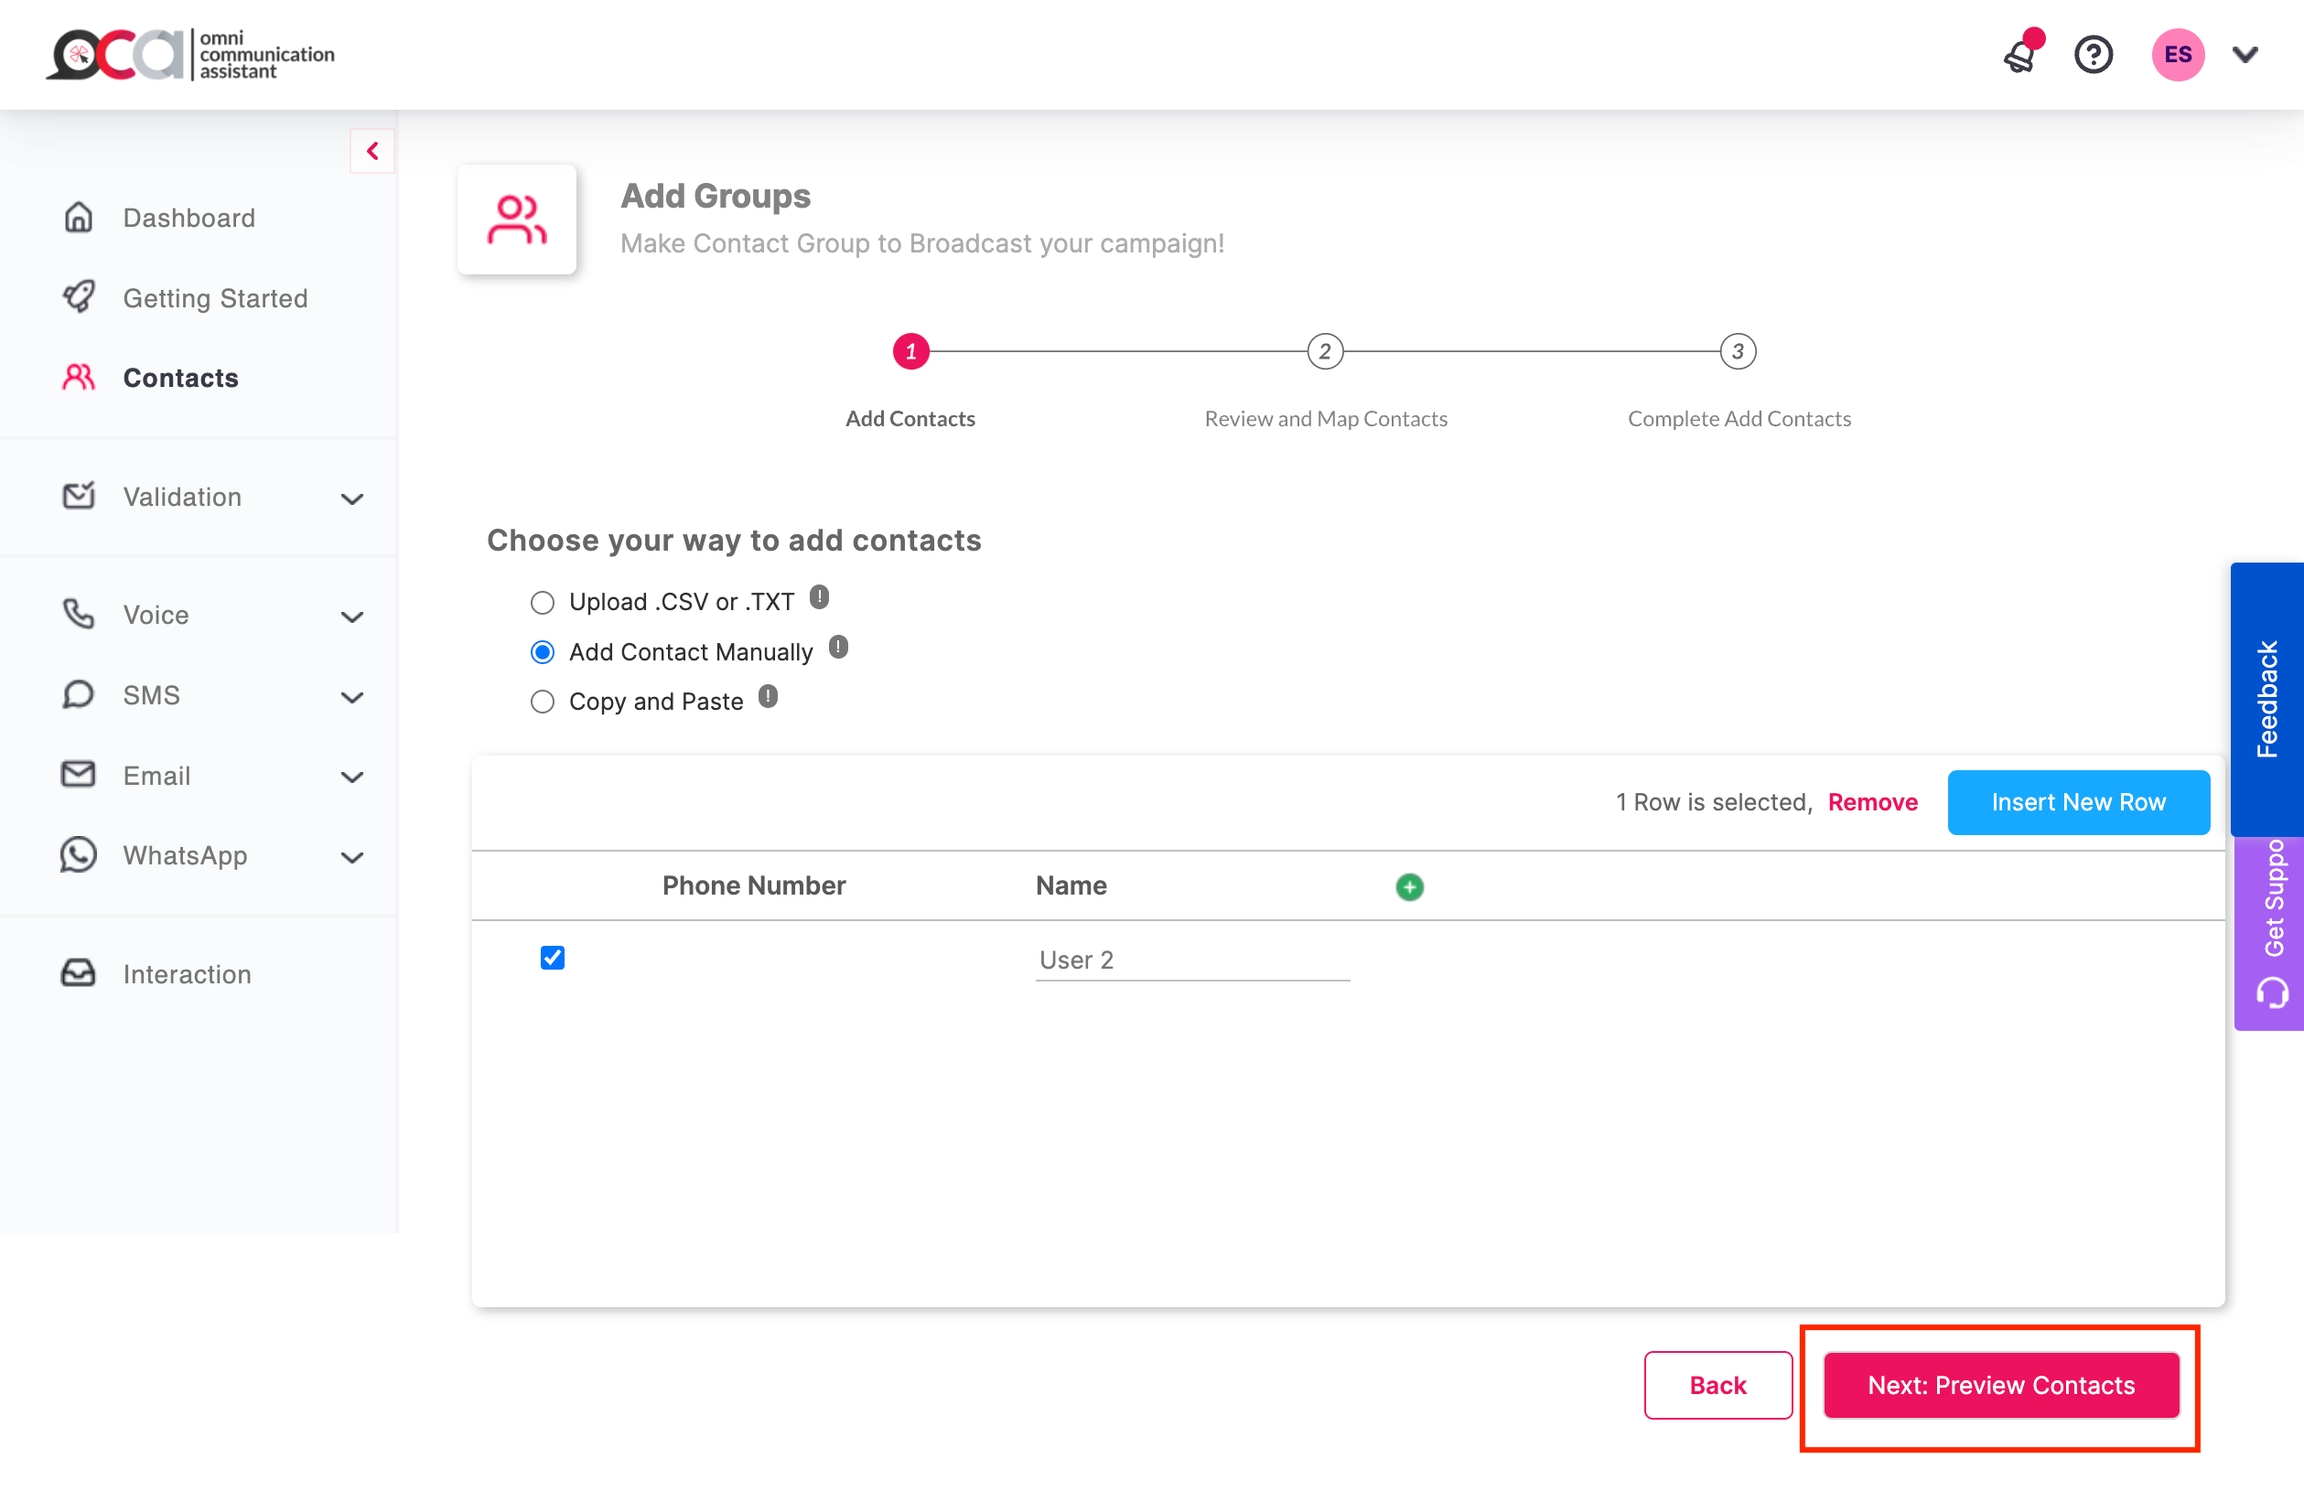
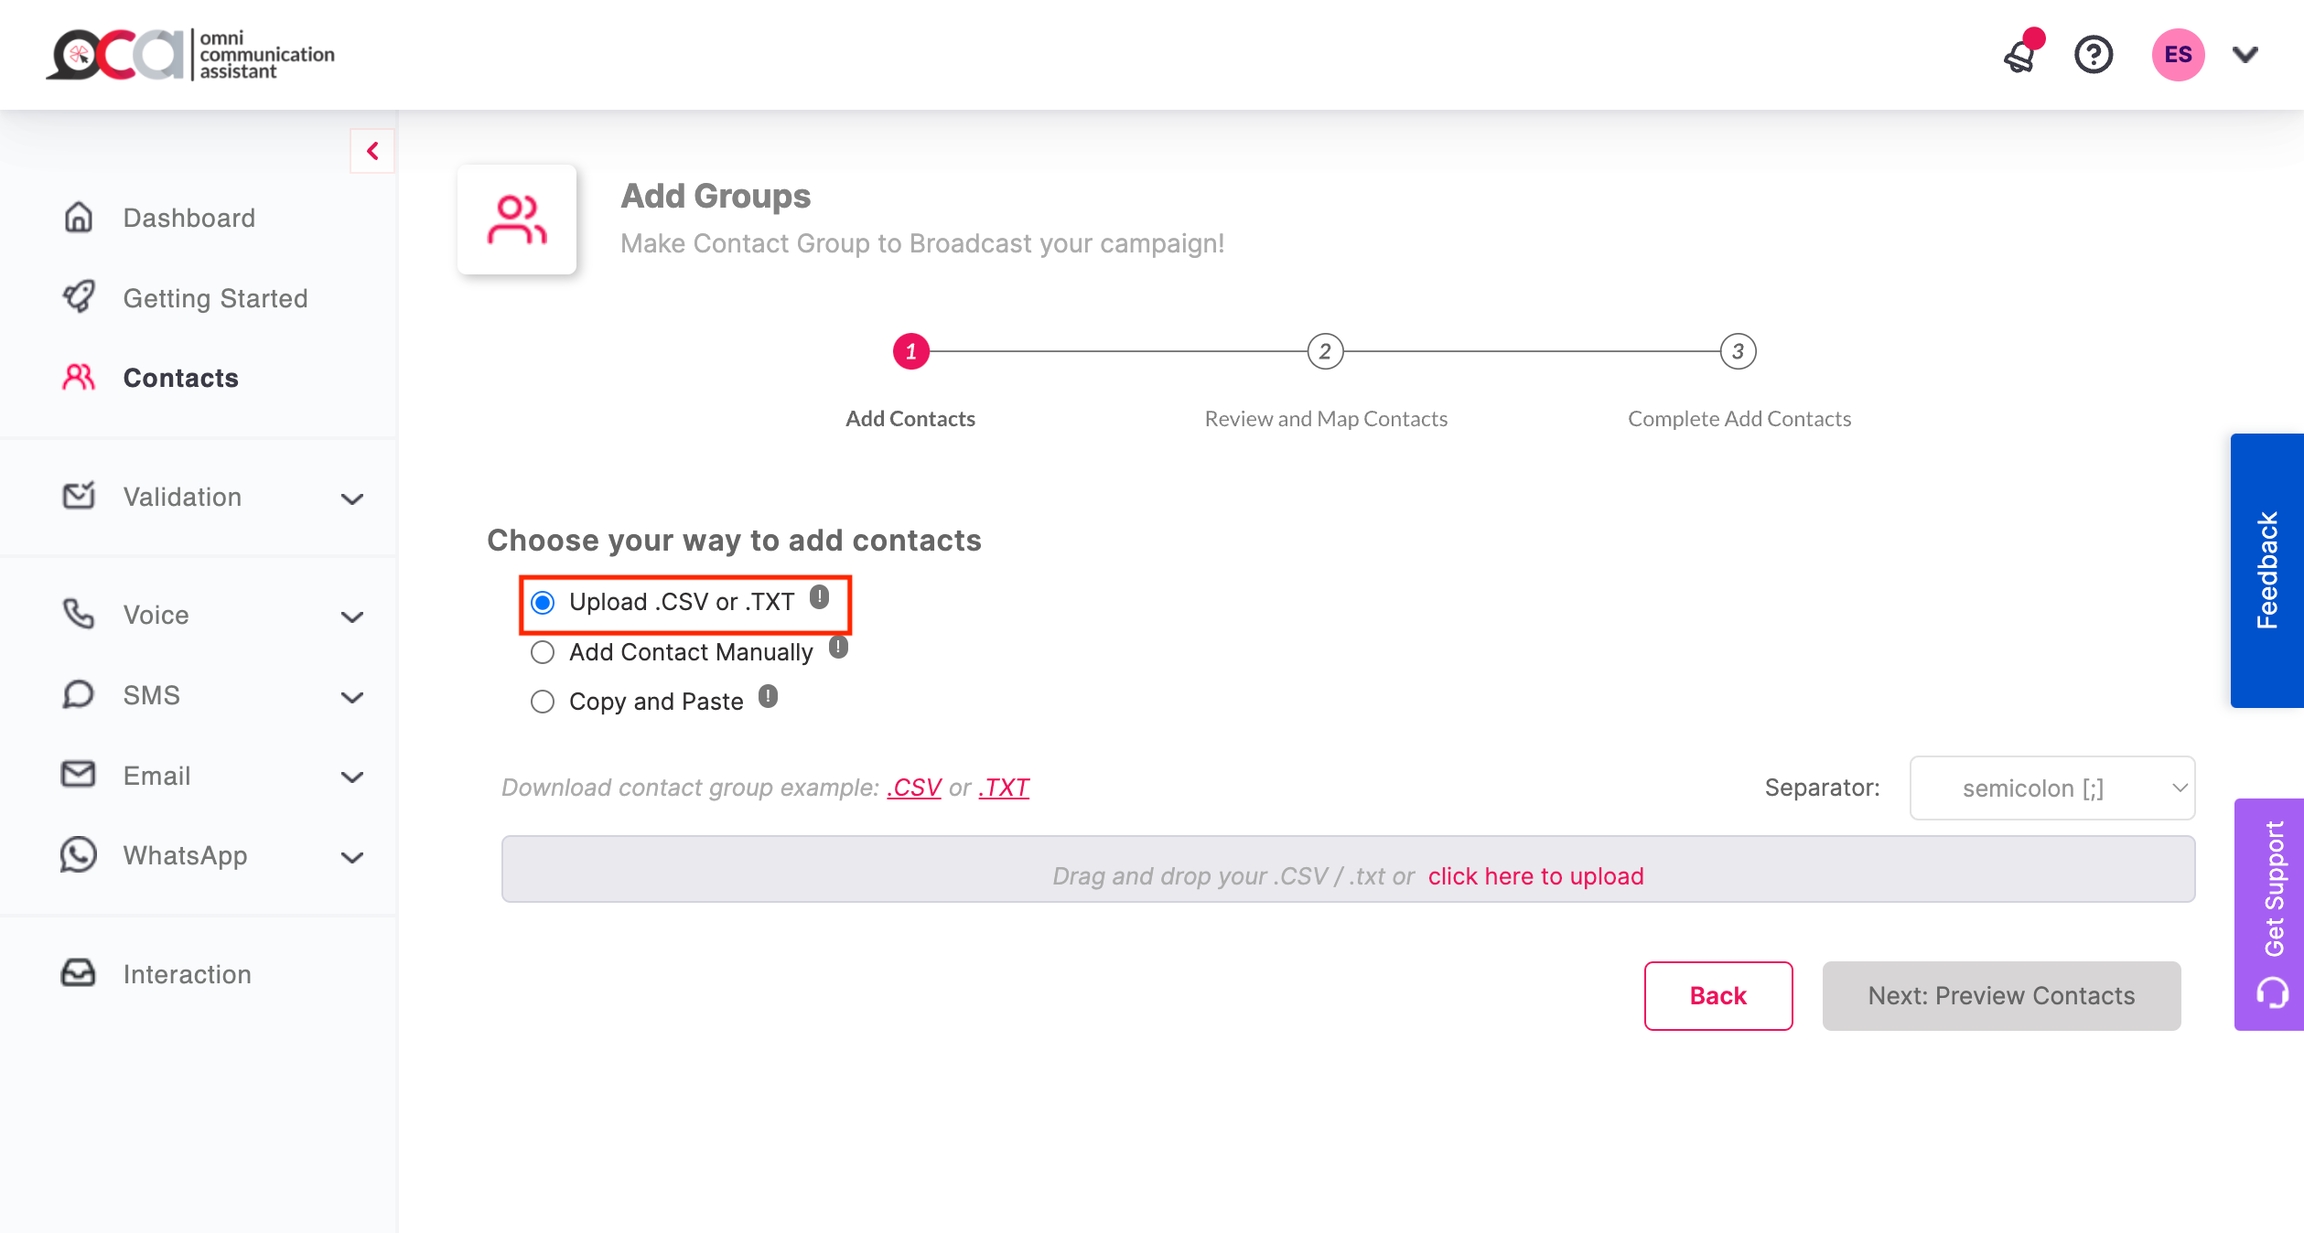
There are three ways to insert contacts:
Upload .csv or .txt: Import them from an Excel file.
Add Contacts Manually: Input them one by one manually.
Copy and Paste: Copy up to 200 contacts from an Excel sheet.

To add a contact, choose the option to Add Contact Manually. Then, provide the necessary information for the contact you want to add. Finally, select the Next: Preview Contacts button to verify your entered information.
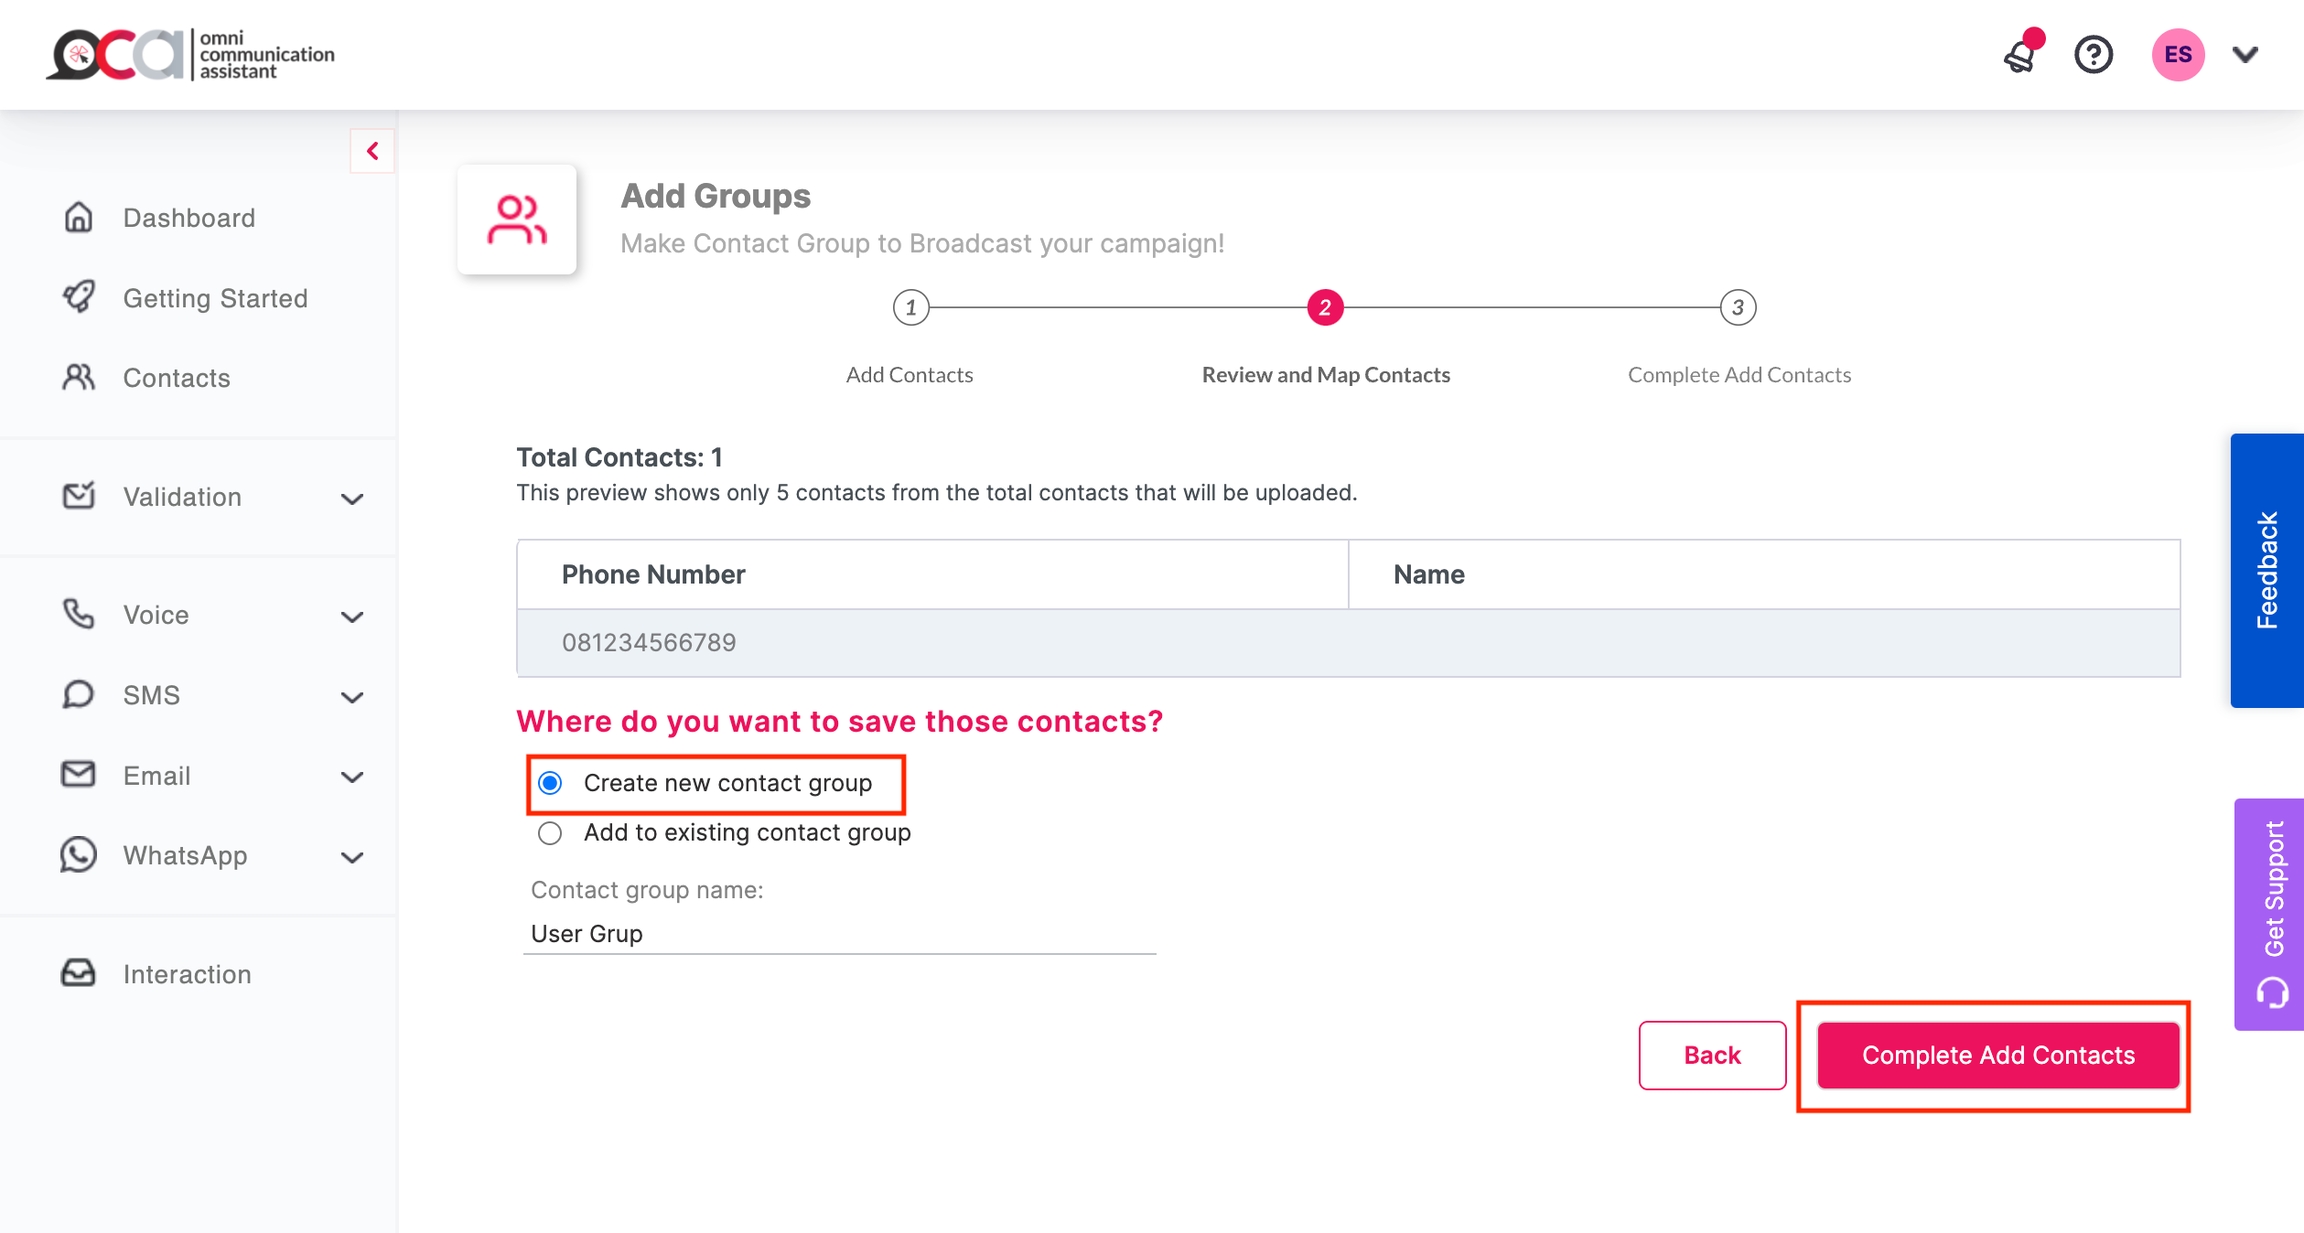
In the next step, you will see the contact in the preview. You can save the contact in a new contact group or add it to a contact group you have already created.
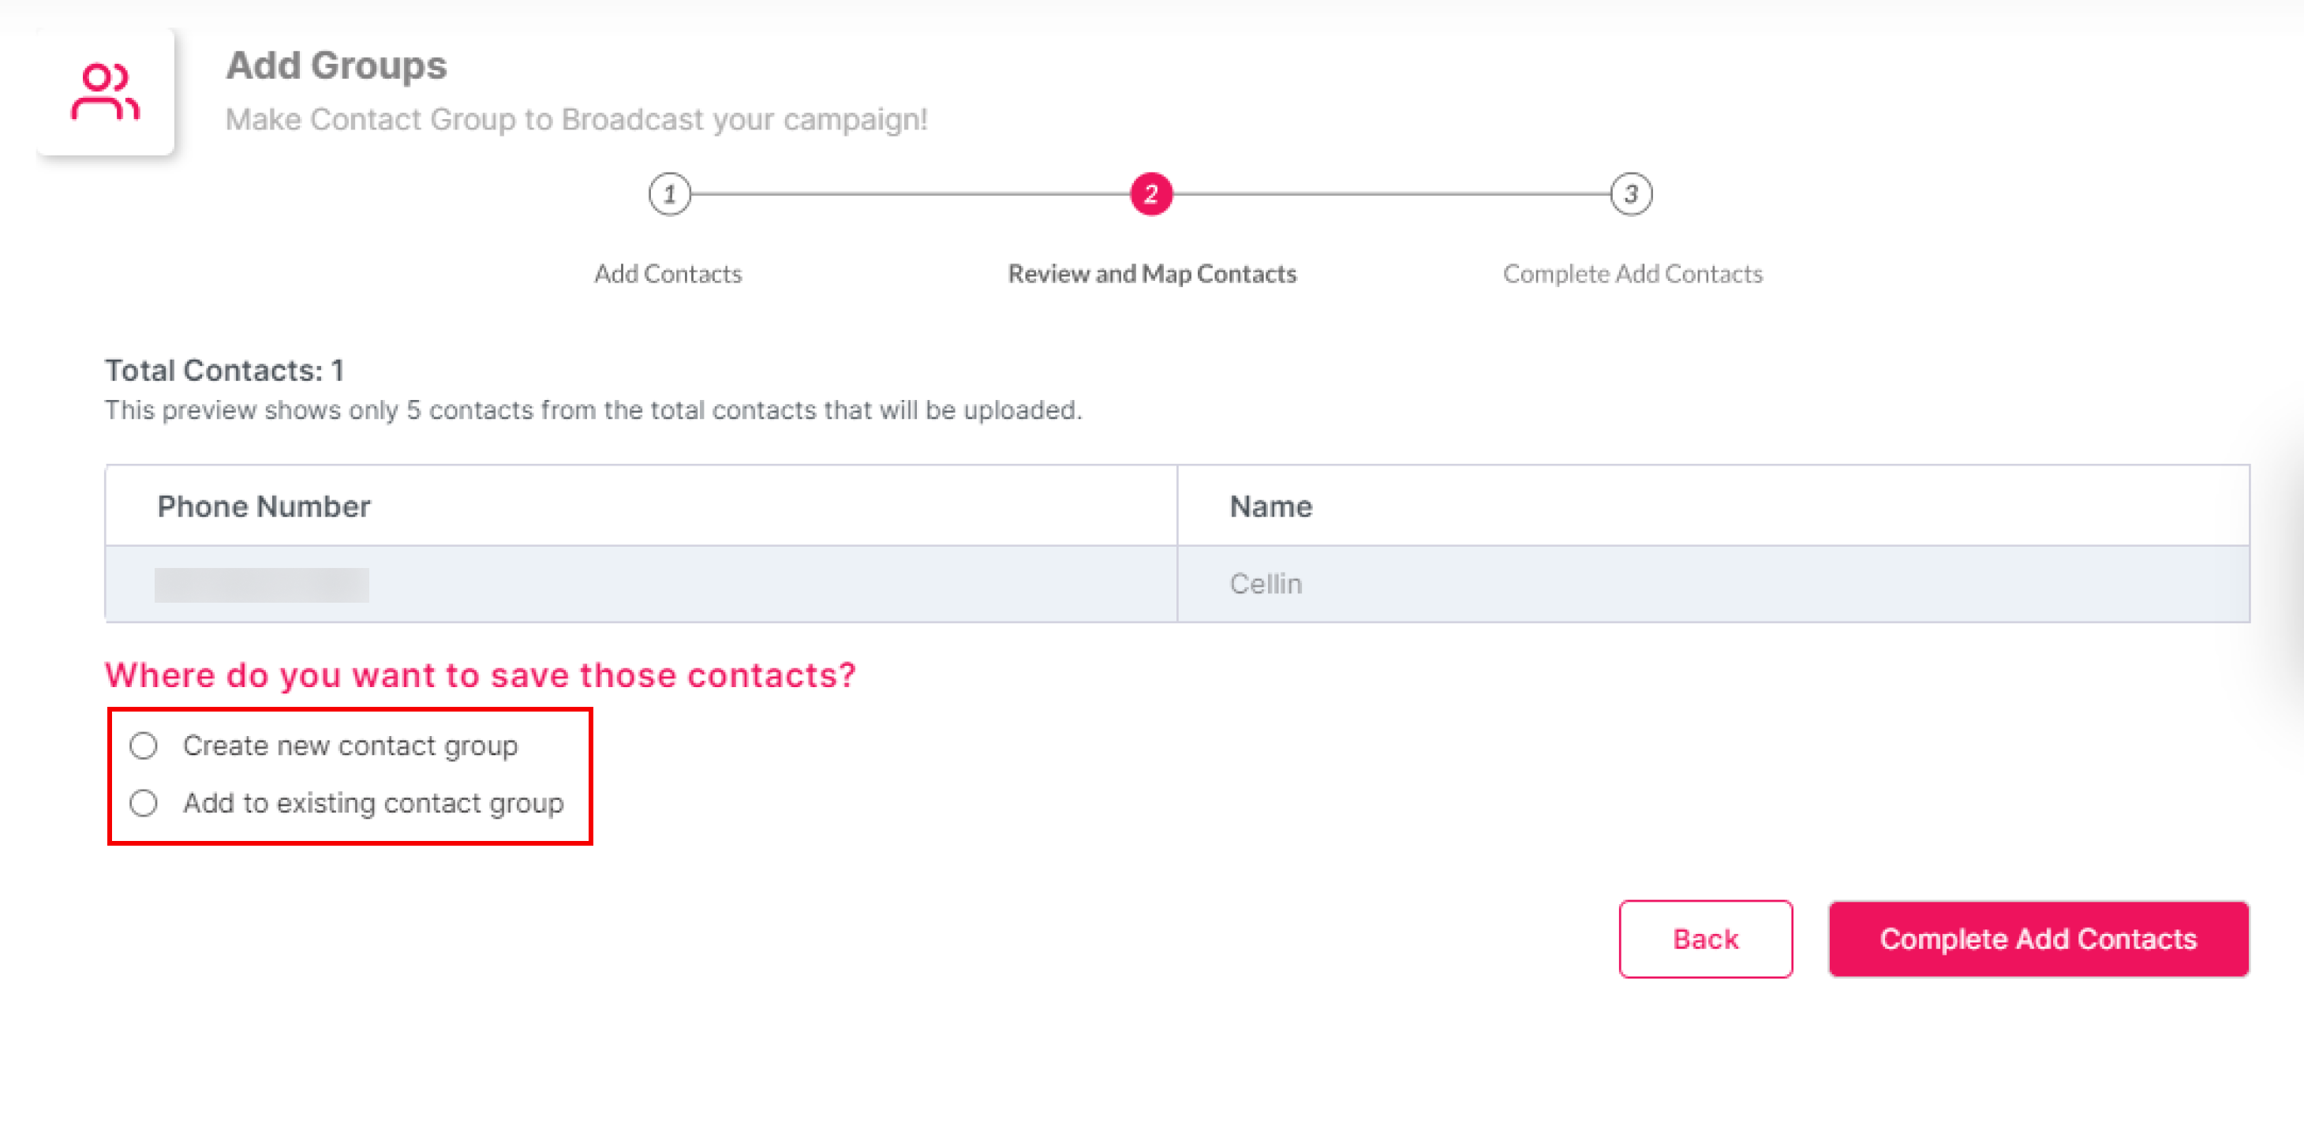
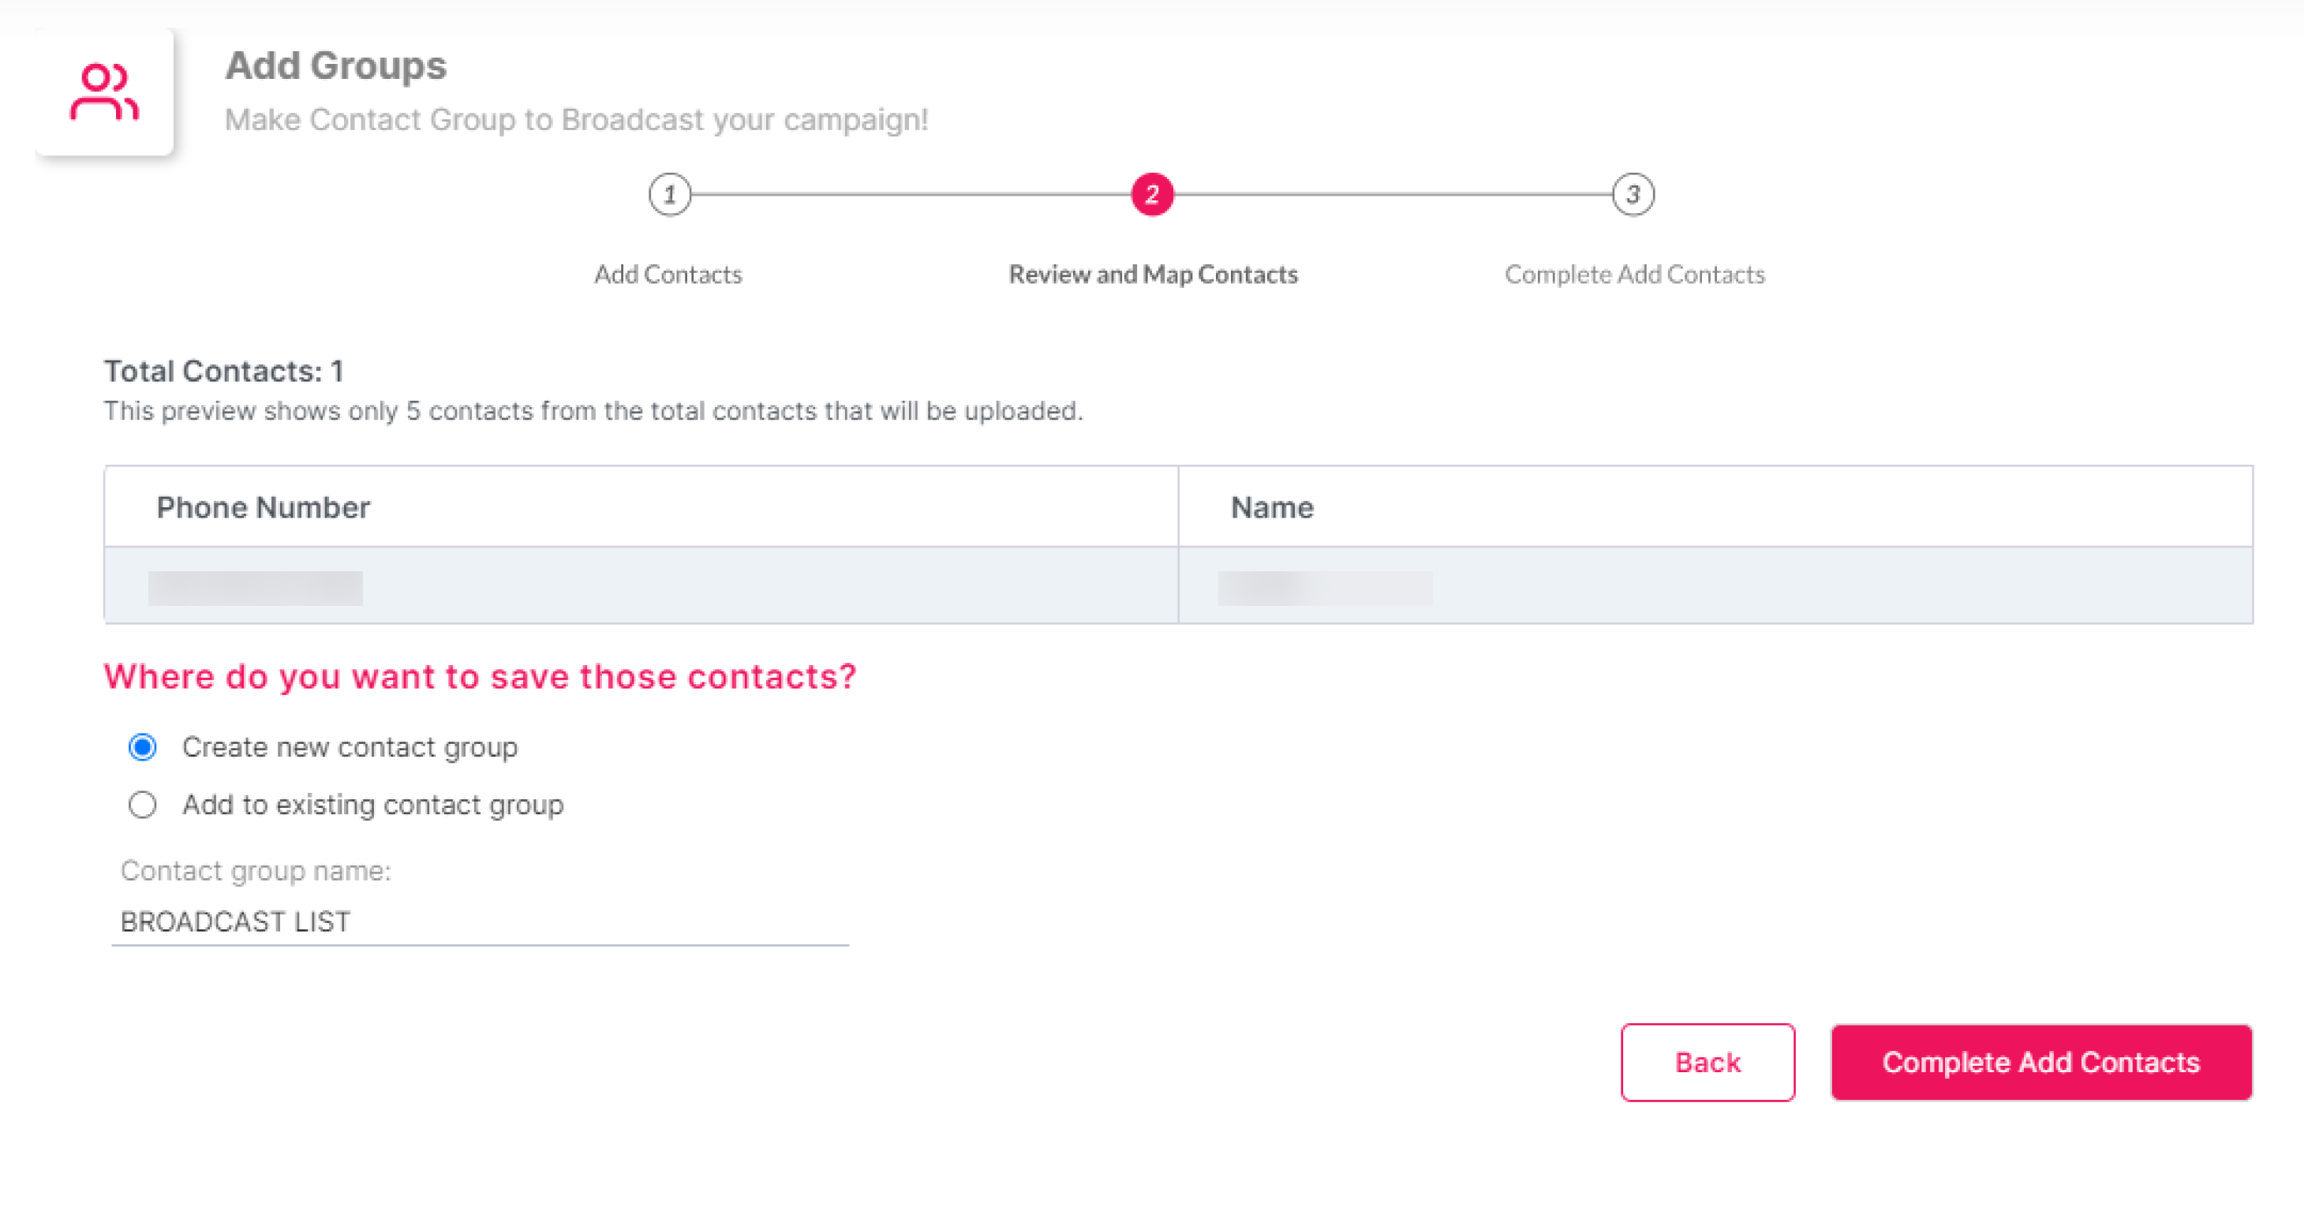
To create a new contact group, enter the group's name and click the Complete Add Contacts button to save.
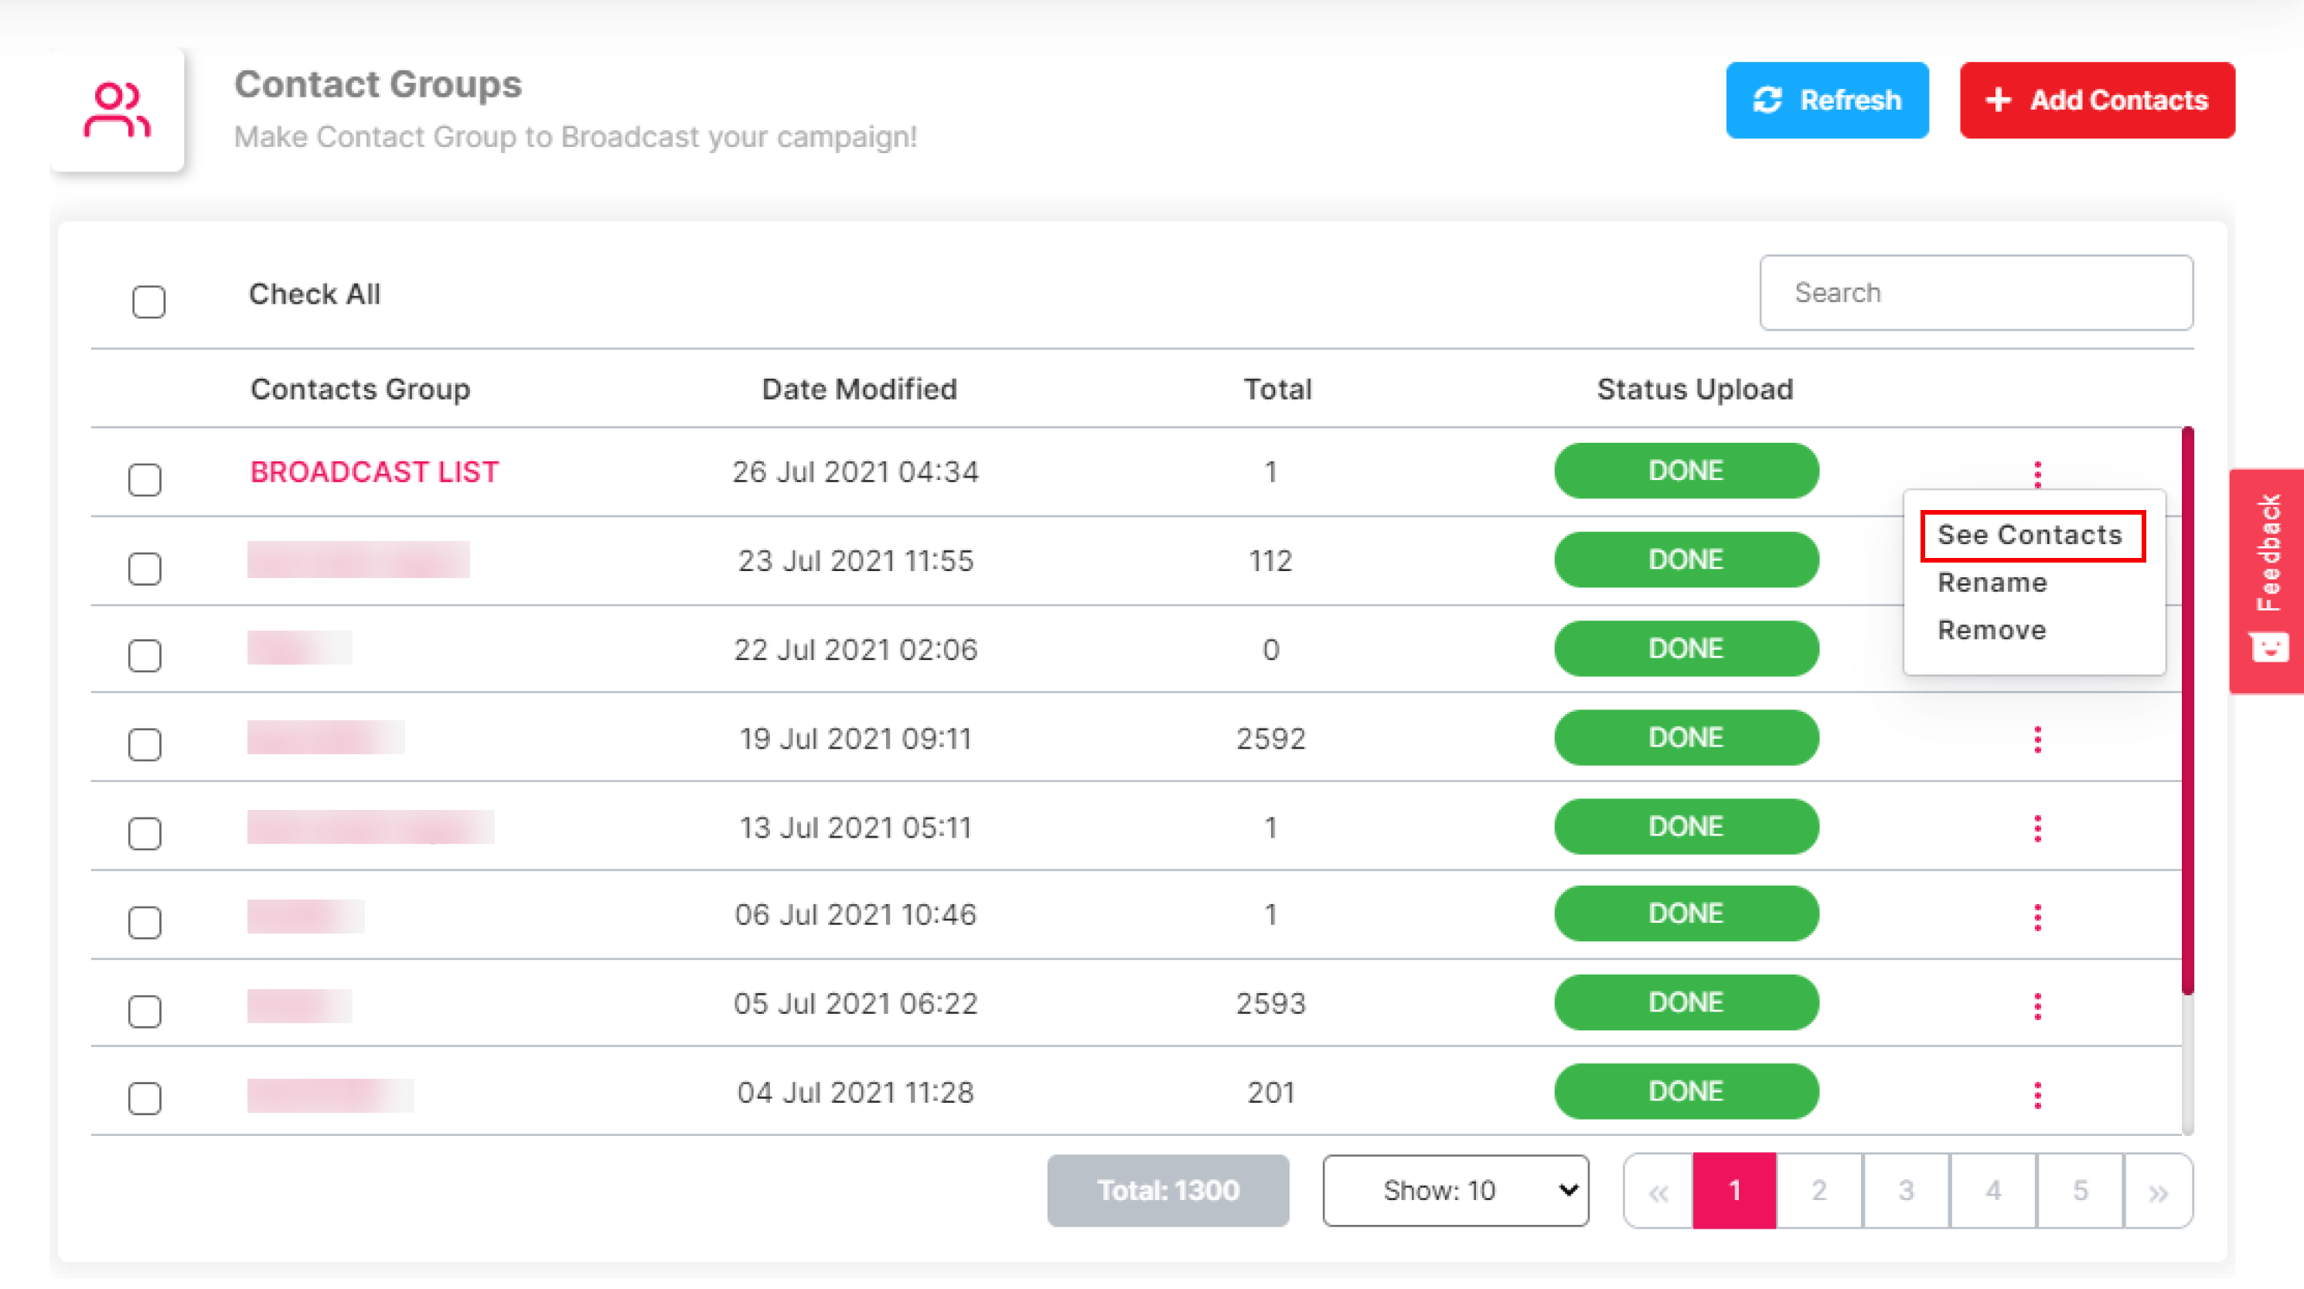
To view or add a list of contacts in group contacts, simply select the "See Contacts" option.
To add contacts, click the "Add Contact" button at the top right. If you have a contact list saved in a .csv or .txt file, you can easily upload it by selecting the .csv or .txt option.
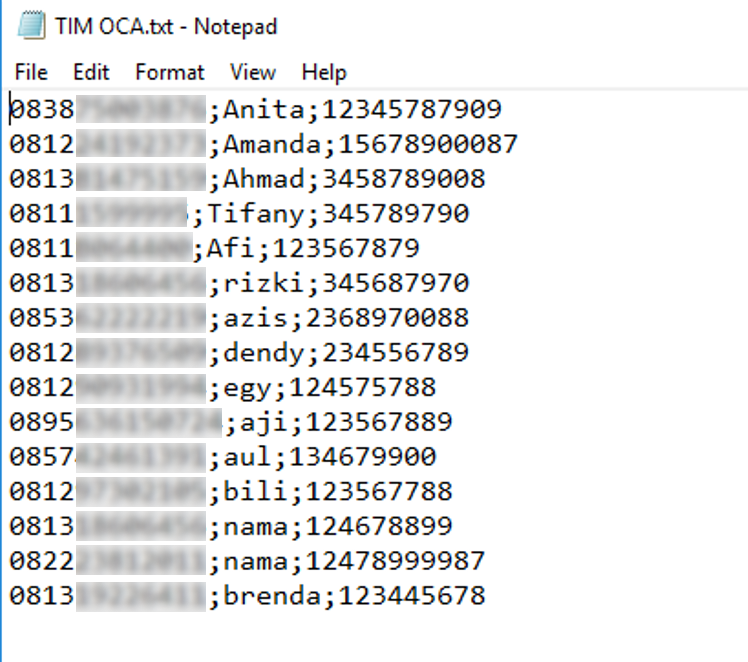
For example, in the image below, the contact list has three fields: Phone Number, Name, and Customer Number. The separation between fields is done using a semicolon ";”
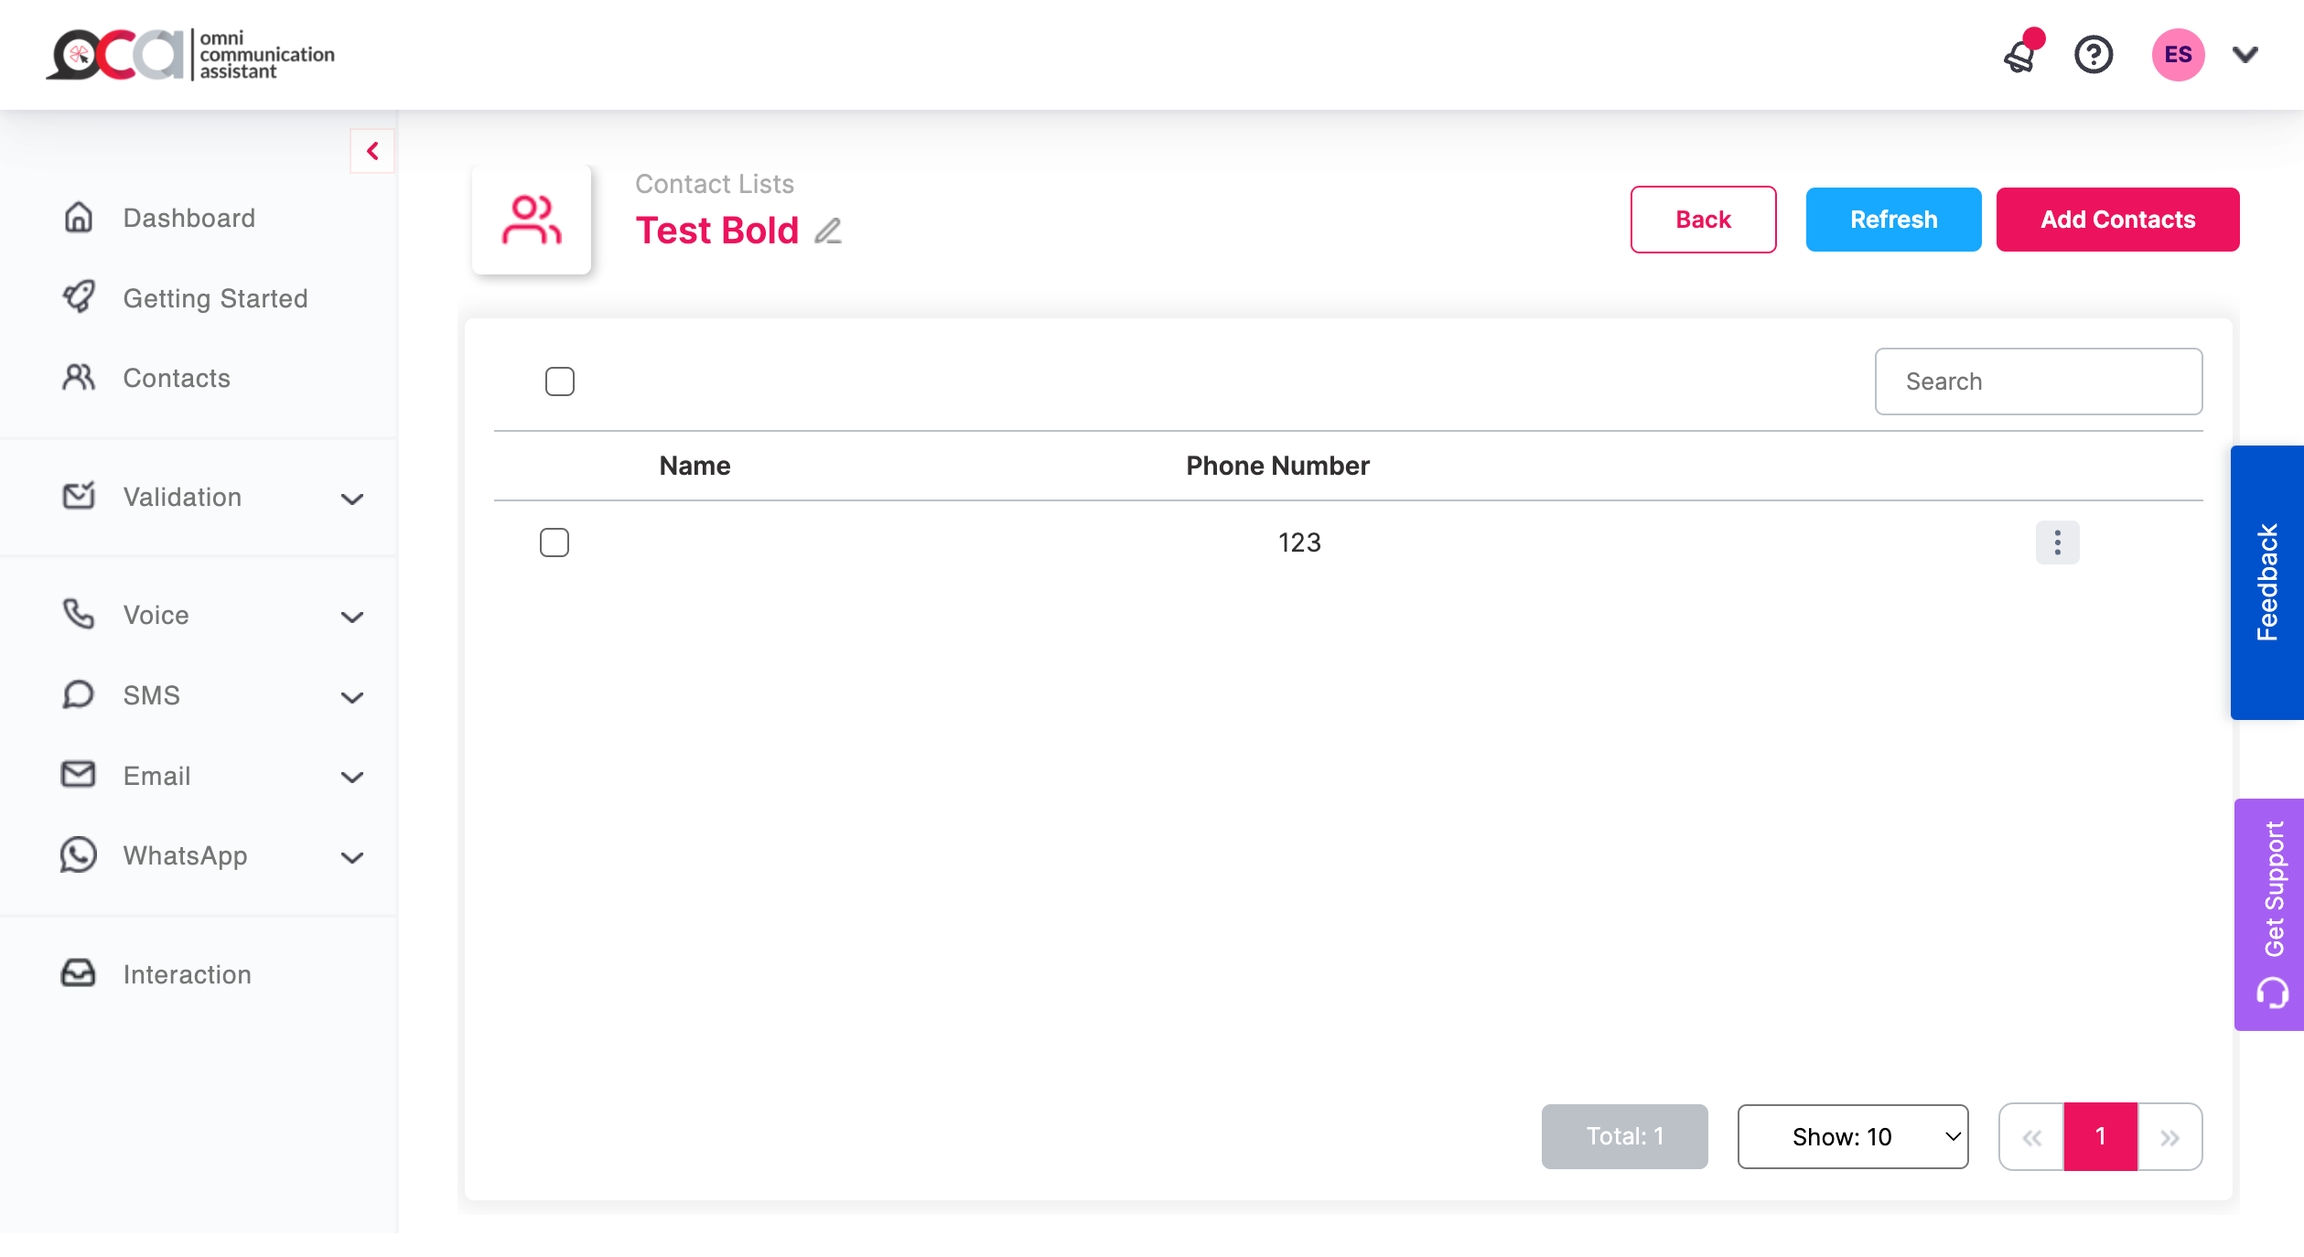
So that the contact list will automatically update as shown below:
To add contacts, copy and paste them into the designated area.
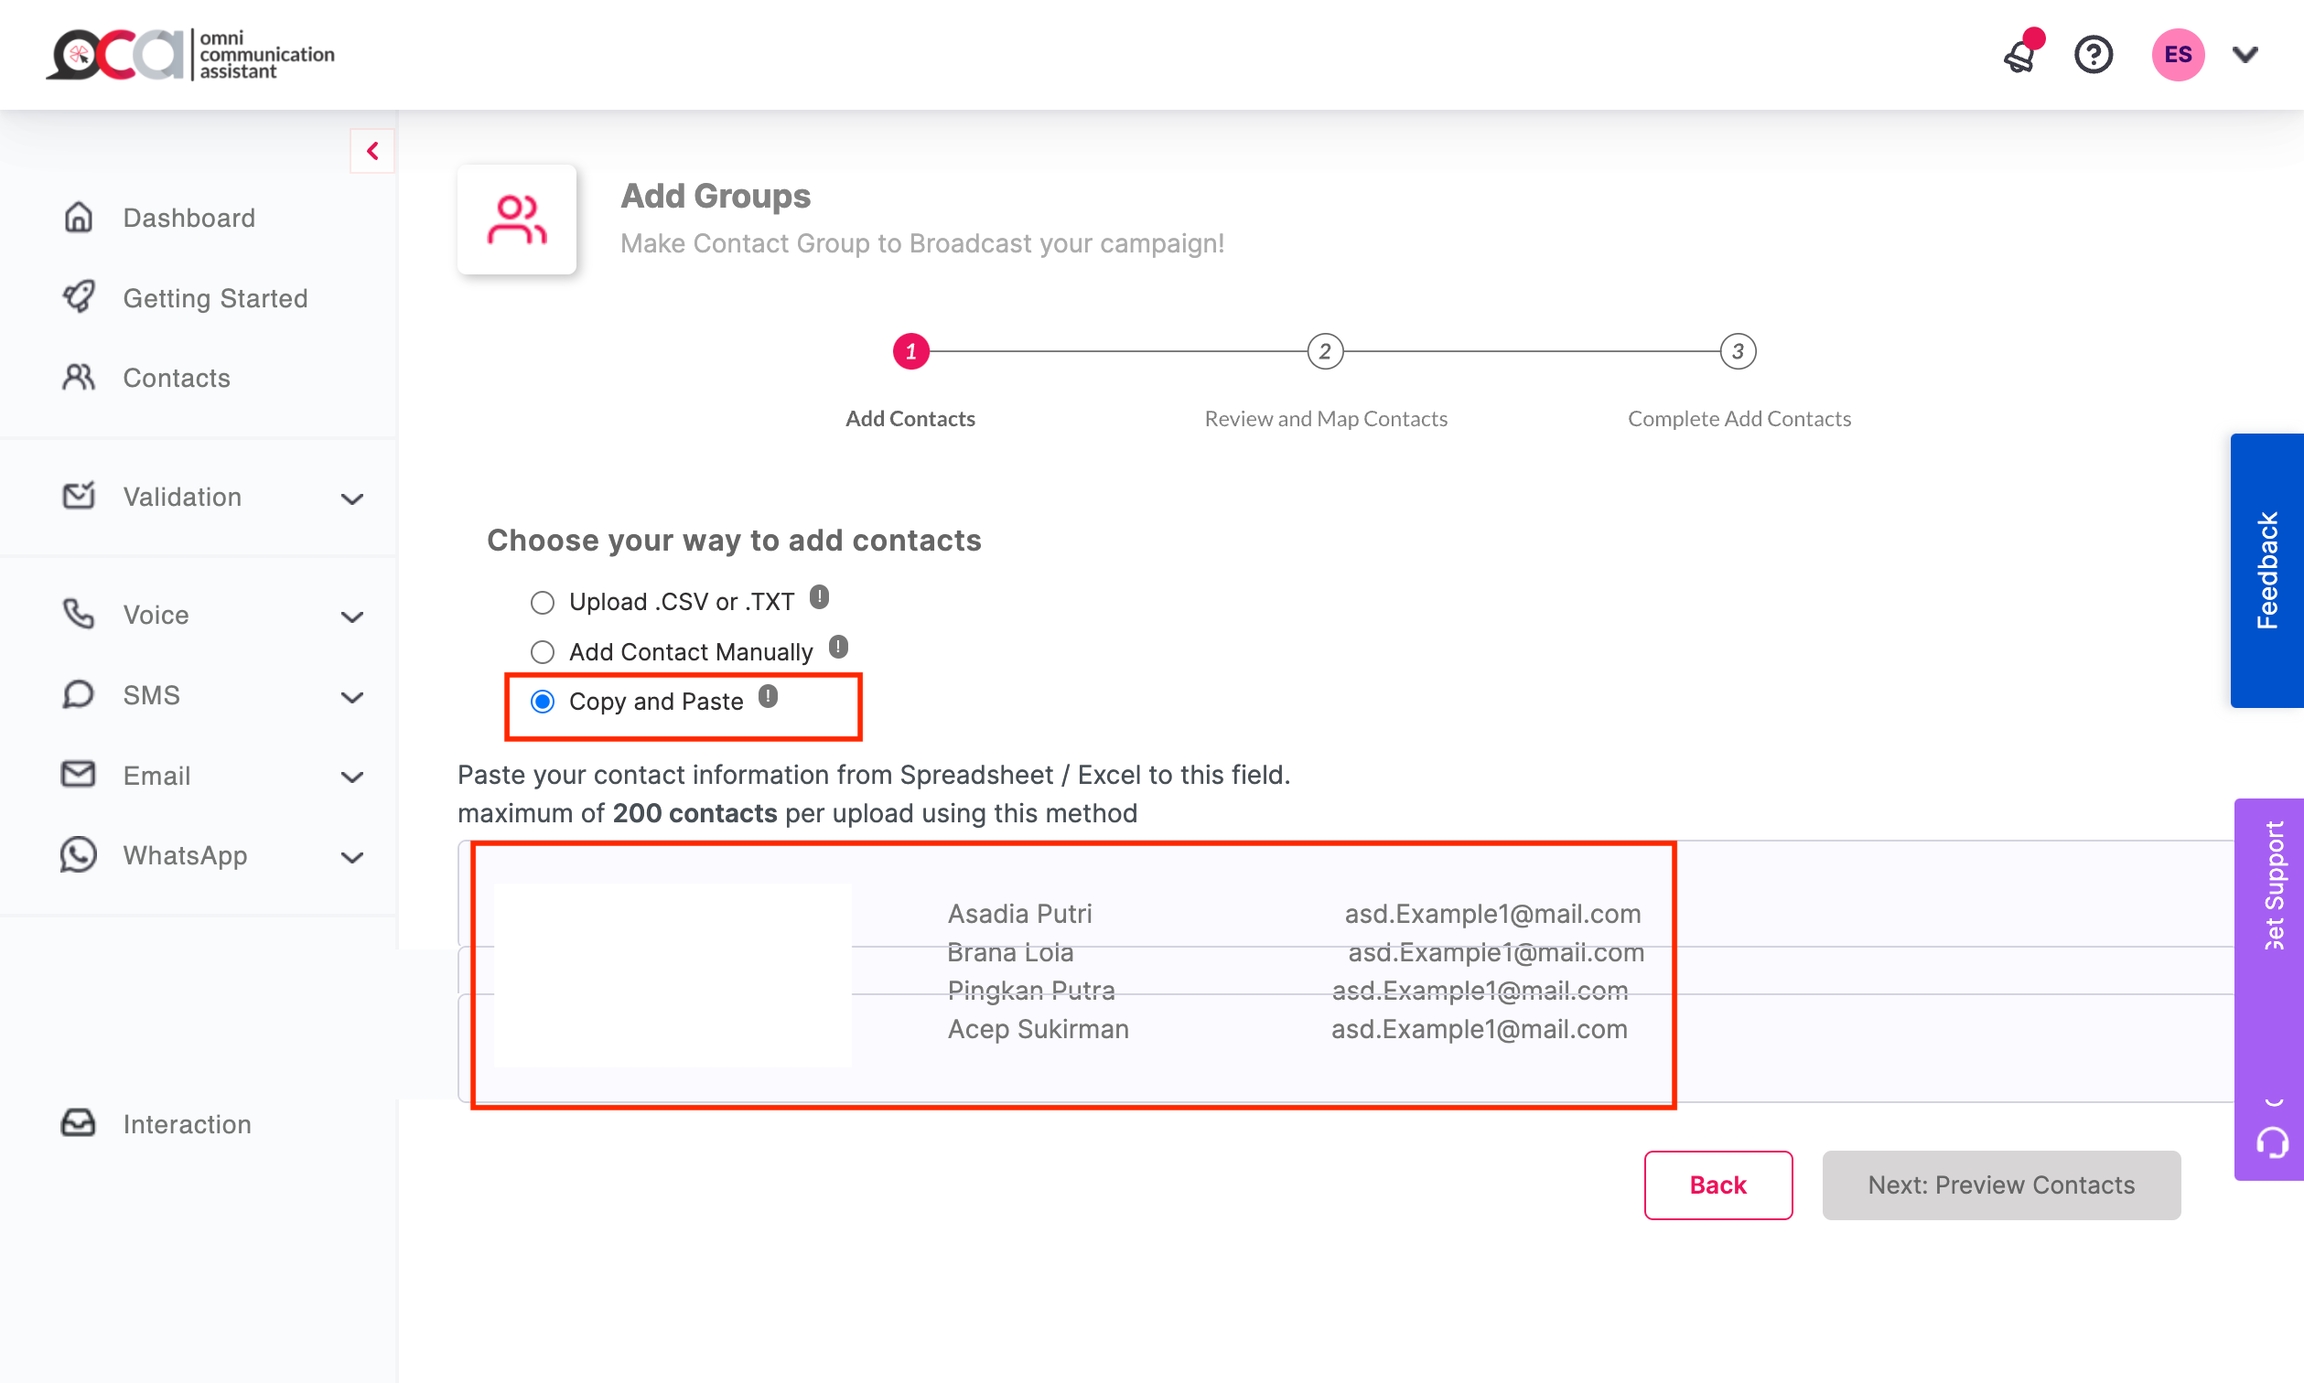
To copy and paste contact information, select the Copy and Paste method. Copy the data from a spreadsheet or Excel and paste it into the text field at the bottom of the page. Then, click the "Next: Preview Contacts" button to review the pasted contacts.
After clicking the "Next: Preview Contacts" button, the system displays the contact information based on the pasted data. If the displayed information is correct, click the "Create new contact group" button and enter the desired name of the contact group at the bottom of the page. Finally, click the "Complete Add Contacts" button to save the contact information.

So that the contact list will automatically update as shown below:

Last updated